Herb Butter for Turkey | Fresh Herbs
By Emma
Certified Culinary Professional
·
Recipe tested & approved
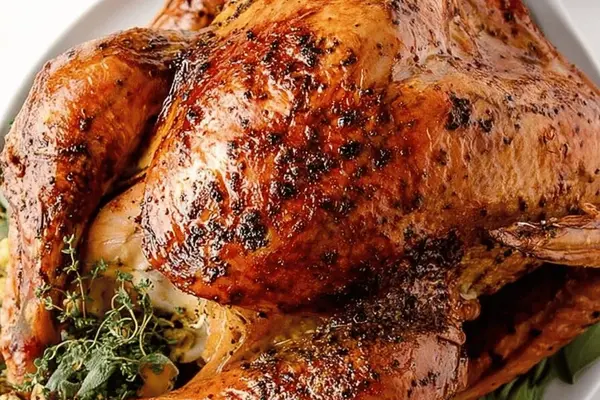
Make herb butter for turkey with fresh rosemary, sage, thyme, and parsley. Massage under skin for moist, flavorful poultry every time.
Prep:
35 min
Cook:
3h 10min
Total:
3h 45min
Servings:
8 servings
Fingers under the skin first—that’s where the magic happens. Herb butter melts straight against the meat while it roasts, so every bite tastes like you actually know what you’re doing. The bird comes out golden, juices run clear, and nobody leaves the table hungry. Holiday dinner. Three hours forty-five minutes. Worth it.
Why You’ll Love This Herb Butter for Turkey
Roasted turkey that tastes intentional, not dry. The herbs go under the skin where they matter—you taste rosemary and sage in every single bite. Smells incredible while it cooks. Seriously. Your house smells like Thanksgiving five minutes in. Twenty to thirty minutes of prep. The actual roasting is just time passing. Gravy made from drippings. Real gravy. Not from a packet. Works cold the next day. Sandwiches taste better than the meal itself.
What You Need for Herb and Butter Turkey
One whole turkey. Twelve pounds. Any bigger and timing shifts.
Six tablespoons of unsalted butter, softened. Cold butter won’t spread. Let it sit on the counter. Half an hour. Maybe forty-five minutes.
Fresh herbs—two tablespoons parsley, a tablespoon each of rosemary, thyme, and sage. Not dried. Dried tastes like dust. Fresh is the difference between good and forgettable.
Kosher salt and black pepper. One and a half teaspoons, one teaspoon. Grind the pepper fresh if you can. Pre-ground works too.
One apple, two celery stalks, one small onion. Rough chop everything. They go in the cavity to keep things moist from the inside out. Champagne or ginger ale for the pan—something with bubbles. Dry white wine works. Apple cider too. Not regular ginger ale, the expensive kind. It matters.
For gravy: three tablespoons butter, three tablespoons flour, four cups broth. That’s it. Everything else comes from the pan drippings.
How to Make Herb and Butter Turkey
Set the oven to 345 degrees. Not 350. The gentler heat keeps everything from drying out.
Line your roasting pan with foil—cleanup later will feel like a gift to yourself.
Dump the softened butter in a bowl with the herbs. Smash it. You’re not making something smooth. You want to feel the rosemary, see the sage. Salt and pepper go in. Mix it until everything’s distributed. The smell hits you before you finish.
Slip your fingers under the turkey skin starting at the neck. Work slowly. You’re creating a pocket between skin and meat. Go everywhere—under the breasts, down the sides, around the thighs. It takes a minute. Do it anyway.
Spread that herb butter directly against the meat. Thick. This is where the flavor actually lives. Also smear some inside the cavity. Moisture from the inside out.
Quarters of apple, rough celery, quartered onion—stuff them loose inside the bird. No need to pack it tight. Steam needs to move through.
Place the turkey breast side up in the pan. Pour that champagne or ginger ale over it. Not just a splash. A actual pour. Loosely cover with foil but don’t seal it tight. The skin can’t touch foil or it sticks when you pull it away.
Slide into the oven. Three hours minimum. You’re watching for sizzle at the edges, drippings bubbling. Baste once an hour. Lift the foil carefully, spoon the pan juices back over the skin. Keep doing this every hour. The skin turns golden because of the basting, not in spite of it.
After three hours, pull the foil off completely. Give it a final heavy baste. Return it uncovered for twenty-five to thirty minutes more. The skin gets deep golden and crispy. Juices run clear at the thigh joint. Internal temp at the thickest part of the thigh hits about 178 to 180 degrees. Don’t just trust the thermometer—press the meat with your thumb. It should give without resistance. Juices should run clear, not pink.
Pull it out. Tent loosely with foil. Rest it. Twenty to thirty minutes. This part is non-negotiable. The meat reabsorbs liquid. Carving stays clean. You’ll feel the difference.
How to Get Turkey Skin Crispy and Golden
The foil trick matters. Loose coverage at first, then full uncovering at the end. You’re steaming then roasting. Not one or the other.
The basting. Every single hour. The drippings coating the skin is what gives you that color. Not a rub on top. The liquid underneath.
Temperature control. 345 degrees, not higher. Higher and the skin burns before the inside cooks. Lower and everything takes forever. 345 hits the sweet spot where the skin crisps while the meat stays juicy.
The champagne or ginger ale matters too. The acidity and bubbles keep the skin from sticking to foil while adding flavor you won’t identify but absolutely taste.
Herb and Butter Turkey Tips and Common Mistakes
Don’t skip the resting time. Thirty minutes feels long when you’re hungry. The turkey reabsorbs juice. Carving is actually easy instead of stringy and frustrating.
Make sure the butter is actually softened. Room temperature. If it’s cold, it won’t spread under the skin and you’re just smearing grease.
Baste at least once an hour. Mark it on your phone if you’re forgetful. The skin won’t be golden without it. It’s annoying. Do it anyway.
Fresh herbs under the skin. Dried herbs taste like straw in comparison. Non-negotiable.
Don’t pack the cavity. The vegetables need room for steam to circulate. Loose stuffing means moist turkey.
The gravy pan—don’t skip the roux step. A full ten to twelve minutes of stirring. The flour needs time to brown and develop that toasty flavor. Rushing it means gravy that tastes like flour soup.
Use the actual drippings. That brown stuff stuck to the bottom of the pan is flavor. Scrape it up. Add it to the gravy. That’s what makes it taste like it came from an actual turkey.
Herb Butter for Turkey | Fresh Herbs
Prep:
35 min
Cook:
3h 10min
Total:
3h 45min
Servings:
8 servings
Ingredients
- 1 whole turkey, about 12 lbs
- 6 tbsp unsalted butter softened
- 2 tbsp fresh parsley chopped
- 1 tbsp fresh rosemary minced
- 1 tbsp fresh thyme leaves
- 1 tbsp fresh sage chopped
- 1 1/2 tsp kosher salt
- 1 tsp freshly ground black pepper
- 1 medium apple cut into quarters
- 2 celery stalks roughly chopped
- 1 small onion quartered
- 1 cup champagne or ginger ale (sub: dry white wine or apple cider)
- 3 tbsp unsalted butter (for gravy)
- 3 tbsp all-purpose flour
- 4 cups turkey or chicken broth
- Pan drippings from roasted turkey
Method
- Turkey
- 1 Set oven at 345°F rather than strict 350°F; gives gentler heat. Line entire roasting pan with foil for easier cleanup but don’t cover completely on the bird yet.
- 2 In a bowl, smash softened butter with herbs, salt, and pepper until all combine. Feel the coarse texture of fresh rosemary mingling with sage—aroma starts hitting hard.
- 3 Run fingers carefully beneath turkey skin starting at neck opening sparing no section. That butter mixture gets spread thick right against the meat itself, a hidden layer of fat and herb power. Also smear a bit inside the cavity to keep flavor moist.
- 4 Stuff apple, celery, and onion loosely inside the cavity. No need to compact — let steam circulate to build scent inside the bird while roasting.
- 5 Plop turkey breast side up in foil-lined pan. Pour champagne or sparkling ginger ale over it to keep steam moisture and add subtle tang. Cover bird loosely with foil but avoid trapping it tight; skin mustn't touch foil or it sticks and tears.
- 6 Slide pan into the oven. Bake for roughly 3 hours but listen for the subtle sizzling and watch juices bubbling near edges. Baste once every hour - lift foil carefully, spoon drippings back over skin. Keeps meat from drying out and gives that eventual shiny golden color.
- 7 After about 3 hours, reveal turkey by removing foil entirely. Give it a last heavy baste then return uncovered for 25 to 30 minutes more, watching skin turn deep golden brown with crispy edges while juices run clear. Thigh meat hits about 178-180°F internal temp when done but eyeball texture too; it should yield easily under thumb pressure, juices running clear near the leg joint.
- 8 Take turkey out, tent loosely with foil to avoid drying but let rest for 20-30 minutes. Rest is critical — meat fibers relax and reabsorb liquid, carving gets cleaner not stringy.
- 9 Remove stuffed veggies from cavity - compost or use pie filling if you like faint flavors left inside. Carve carefully with a sharp knife, breast first, then legs and wings.
- 10 Serve with gravy.
- Gravy
- 11 Heat 3 tbsp butter in saucepan over medium. Think slowly melted, no brown bits yet.
- 12 Whisk in flour forming a paste - the roux. Keep stirring for up to 12 minutes until it darkens to light tan with a toasty nut aroma; patience here means flavor, don’t rush or burn it.
- 13 Add broth slowly while whisking, then scrape pan drippings into sauce. Adjust thickness by adding broth or cooking down a bit. Bring to simmer, not boil, to thicken without breaking sauce.
- 14 Taste. Salt and pepper as needed. Gravy should taste balanced - rich but not salty or bitter.
- 15 Keep warm until ready to serve, stirring occasionally to prevent skin formation.
- 16 Enjoy with turkey.
Nutritional information
Calories
425
Protein
38g
Carbs
7g
Fat
28g
Frequently Asked Questions About Herb and Butter Turkey Recipe
Can I make the herb butter the day before? Yeah. Mix it up, store it in the fridge covered. Pull it out an hour before you need it so it softens. Actually works better because the flavors blend overnight.
What if I can’t find fresh rosemary? The recipe shifts. Not better, not worse—just different. Dried rosemary works in a pinch. Use half the amount. It’s stronger. Fresh is worth a trip to the store if you can swing it.
How do I know when it’s actually done? Thigh temp hits 178 to 180 degrees. But also press the meat. It should give under thumb pressure without feeling mushy. Juices run clear at the joint. Any pink near the bone means more time.
Can I use this herb butter on chicken instead? Absolutely. Smaller bird though. Chicken roasts in maybe an hour and a half at the same temperature. Same technique. Same butter-under-the-skin method. Works just as well.
What if I don’t have champagne? Ginger ale. Apple cider. Dry white wine. Anything with a tiny bit of acidity and body. Plain water works but you’re missing the subtle flavor. Not worth it if you have literally anything else.
Do I have to make gravy? No. But the drippings are too good to waste. At minimum, deglaze the pan with broth, scrape up the brown bits, and pour it over the meat. That’s gravy in its simplest form. The roux version just makes it thicker and richer.
Can I prep the turkey the night before? Get the herb butter under the skin the morning of, not the night before. If you do it too early, the herbs start to cook before the oven even turns on. Morning is better. The butter has time to soften and the herbs stay bright.
You’ll Love These Too
Explore all →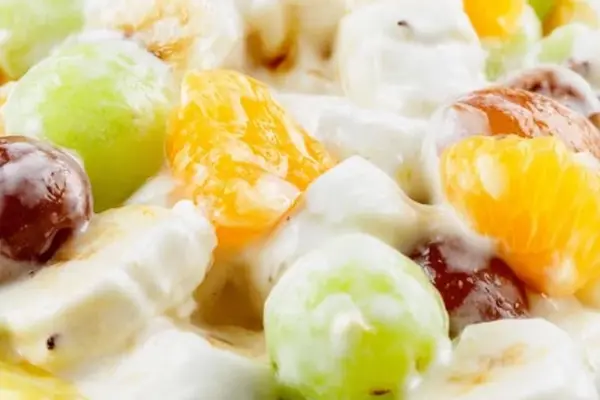
Creamy Custard Fruit Salad with Pecans
Grilled Guacamole with Charred Tomatillo Salsa
Jeera Rice Recipe: Cumin Basmati Rice
Red Velvet Yule Log with Italian Meringue
Chocolate Ganache Chocolate Cake Filling
Homemade Andouille Sausage Recipe
Grilled Beef Sandwiches With Pickled Fennel

Chicken Soup With Wild Rice Recipe
Cucumber Feta Avocado Salad Recipe
Grilled Chicken Breasts with Honey Soy Marinade
Homemade Soft Pretzels with Honey & Baking Soda
Homemade Pretzels Recipe with Agave Syrup
Salted Caramel Chocolate Cake Recipe
Pumpkin For Pie: Spiced Cake With Filling
Beef Stew with Chickpeas and Smoked Paprika
Salted Caramel Doughnuts with Dulce de Leche
Caramel White Chocolate Tangerine Tart
Baked Sweet Potato Pie with Quinoa
Rustic Shortcakes with Spelt Flour & Berries