Caramelized Pear Hand Pies
By Emma
Certified Culinary Professional
Before You Start
Ingredients
- 50 g sugar
- 20 ml water
- 4 ripe but firm Bosc pears peeled cored diced
- 20 ml lemon juice
- 15 ml olive oil
- 1/2 vanilla bean split scraped (optional)
- 6 pre-made gluten-free pie crust discs
- 1 egg yolk beaten
- 30 ml agave syrup
In The Same Category · Desserts
Explore all →About the ingredients
Method
Pear filling
- 1. Heat sugar and water in saucepan til amber caramel forms. Resist stirring, watch color shift from pale gold to deep bronze. Off heat, toss in diced pears, lemon juice, olive oil, vanilla seeds. Sizzle and bubble sharply. Stir gently, caramel will seize but will melt back as fruit softens.
- 2. Simmer gently uncovered, no rush, about 12 minutes, stir to break fruit down slightly. When pears collapse but still chunky, remove vanilla bean pod. Rough-mash with potato masher — chunky bits provide texture contrast.
- 3. Warm mixture thick but not dry. Transfer to bowl, let cool to lukewarm then cover. Chill minimum 45 minutes to firm flavor meld. Filling thickens slightly, important to prevent soggy dough.
Assembly
- 4. Line baking tray with parchment or silicone mat.
- 5. Flour workspace sparingly. Roll discs thinner in center area to about half thickness, leaving edges thicker for good sturdy border. Use 10 cm diameter cutter or repurpose small bowl. You want uneven thickness for crispness and chew. Keep shapes even but don’t obsess.
- 6. Spoon ~40 ml pear filling on top half of each dough round. Use wet finger or pastry brush to moisten dough edge opposite filling to promote seal.
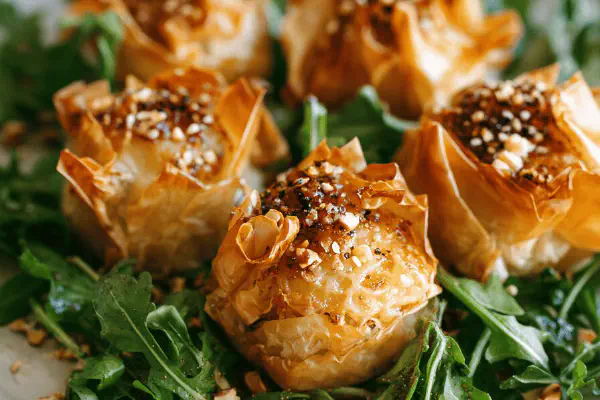
- 7. Fold dough over filling, press edges lightly with fingers to seal initial contact. Then reinforce seal pushing two fingers beside each other around edges, drag back of knife between fingers to crimp decoratively and lock in juice. On rushed days, pinch firmly and fork crimp works too.
- 8. Flash freeze pies 25 minutes to firm edges and stop spreading during baking.
Baking
- 9. Preheat oven to 205 °C with rack centered. Turn pies so flat sides face up. Brush yolk over surface, avoid pooling around edges to prevent sogginess.
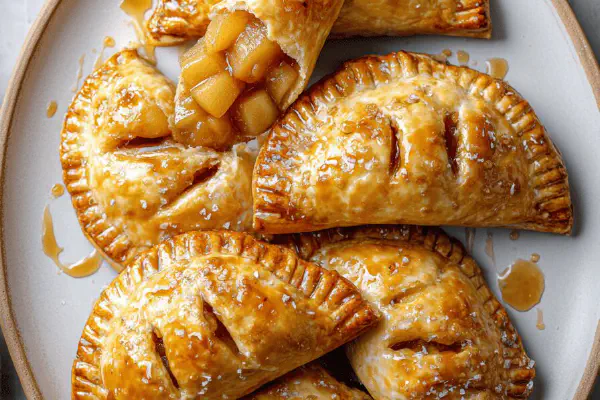
- 10. Using sharp knife, score small leaf pattern lightly on surface without cutting through dough. Punch small vent hole at base to let steam escape — avoid dough bubbles or soggy spots during bake.
- 11. Bake 23-28 minutes watching color shift from pale yellow to golden brown, spots turning almost mahogany. Smell nutty, caramel notes deepen, edges crisp fully. Pull out just before dark to retain tender chew inside.
- 12. Immediately brush warm pies with agave syrup to shine and add subtle caramelized sweetness. Cool on rack til warm before serving.
Storage
- 13. Store in airtight container at room temp for up to 3 days. Re-crisp in toaster oven if needed. Freezer friendly — reheat covered to avoid sogginess.
Cooking tips
Chef's notes
- 💡 Caramelizing sugar demands strict attention, no stirring after amber starts forming or risk crystallizing. Watch color shift from pale gold to deep bronze with soft heat. When tossing pears in, caramel may seize and harden briefly — it melts back with heat and moisture, no panic.
- 💡 For filling texture, simmer gently uncovered to keep chunks intact but break fruit slightly. Avoid puree — chunky bits create contrast to flaky crust. Remove vanilla pod carefully after simmer to avoid bitterness and only scrape seeds before adding for fresh vanilla hit.
- 💡 Thinning dough center to about half thickness while leaving edges thick prevents collapse but retains chew and sturdy rim for sealing in juicy filling. Use small cutter or bowl for consistent rounds. Don’t obsess but keep shapes relatively even for even bake.
- 💡 Flash freeze pies before baking at least 25 minutes. Sets shape, prevents pies from spreading too thin or losing the defined edge during oven time. If skipped, filling may leak and edges go soggy. Freezing also firms edges for easier crimping with fork or knife.
- 💡 Brush egg yolk lightly just before baking, avoid pooling especially near edges to not sog them. Scoring small leaf patterns on top lets steam vent with decorative touch. Punch tiny vent hole at base for controlled steam escape; reduces bubbles and soggy patches.
Common questions
Why caramel sugar seize when adding fruit?
Happens cause caramel cools, moisture hits hot caramel. It hardens fast but melts quickly once heat resumes. Stir gently after initial shock to combine. Don’t worry, fruit acid and water soften and dissolve hard bits during simmer.
Can I use Bartlett or other pears?
Bartlett too soft, fills runny or mushy. Bosc holds shape better under heat, chunks stay intact. If only Bartlett, reduce simmer time or add thickener like cornstarch to compensate. Firmer pears prevent watery filling and soggy dough.
What if dough is too thick in center?
Too thick crust center means dough won’t crisp small bottom, tastes doughy. Crust edges need to stay thick for holding pie shape and sealing filling. Roll discs sparingly, test before assembly by lifting and checking bend, aim half thickness center.
How to store leftover pies?
Airtight container room temp for up to 3 days works, reheating in toaster oven re-crisps edges. Freeze wrapped tightly if longer. Reheat covered from frozen but risk minor sogginess. Don’t stack warm pies, cool completely to avoid moisture buildup.
