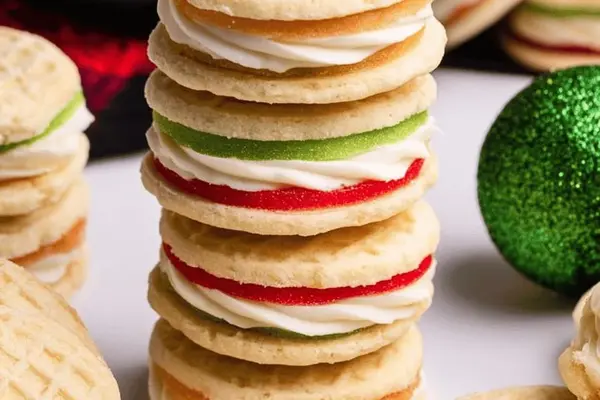
Cream Wafers with Vanilla Buttercream
By Emma
Certified Culinary Professional
·
Recipe tested & approved
Butter goes in the mixer first. Four, five minutes. Watch it go from pale yellow to almost white—that’s when you stop. Smell it. Faintly nutty. That’s the signal, not a timer.
Why You’ll Love These Cream Wafers
Takes 45 minutes total if you’ve got the time. Most of it’s waiting anyway—dough overnight, cookies cooling.
They’re thin. Actually thin. Not thick cookies that pretend to be wafers. The real thing snaps when you bite it.
Homemade vanilla wafers with cream filling taste nothing like the box. Buttery. Actually buttery. Room-temp butter does that.
Perfect for a party or just Wednesday afternoon. Doesn’t matter. People eat them either way.
The sugar coating gives you crunch. Just on the outside. Inside stays soft from the cream.
What You Need for Cream Wafers
Unsalted butter, room temperature. A full cup. Not melted. Not cold. Soft enough your finger leaves a dent.
All-purpose flour, sifted. A cup and a half. The sifting matters—packed flour changes everything.
Heavy cream. Three tablespoons in the dough. Half and half works too if that’s what you have.
Granulated sugar for coating. A quarter cup. Shallow dish, you’ll press the hot cookies into it.
For the filling: butter again, half cup, softened. Powdered sugar sifted. One teaspoon vanilla. A pinch of salt. One to two tablespoons of heavy cream or milk—you’ll add it slow. Optional: gel food coloring if you want it tinted instead of vanilla pale.
How to Make Cream Wafers
Beat the butter in a stand mixer with the paddle. Four to five minutes minimum. You’re looking for it to go pale, almost fluffy, color like softened cream. No stand mixer? Electric hand mixer works. Keep it on low. You’re aerating, not burning the motor.
Add the sifted flour and the three tablespoons of cream. Mix just until it comes together. Stop before it gets tough. One minute, maybe less. Form it into a ball. Wrap it tight in plastic. Into the fridge it goes.
Overnight. At least eight hours. The dough needs to chill. Butter firms back up. Rolling gets easier. Without the chill you’re fighting it.
Next day. Preheat to 370 degrees. Not 375. The lower temp slows the edges browning. Gives you crispness instead of dark cookies.
Line a baking sheet with parchment.
How to Get Cream Wafers Crispy and Perfect
Flour your counter lightly. Work in small batches. Roll the dough thin. One-eighth inch. That thickness is everything. Too thick and it’s a cookie. Too thin and it shatters before filling. One-eighth is the target.
Use a one-inch round cutter. Small wafers. Cut them out fast before the dough warms up.
Pour granulated sugar into a shallow dish. Press each hot cookie into the sugar—both sides. Flip it. Press again. The sugar stays. It cracks when you bite it. That’s what you want.
Arrange them on the baking sheet spaced apart. Then pick up a fork. Prick the center three times. Three holes. Steam escapes. Cookie stays flat. Skip this step and they balloon. Seriously. Pricking is non-negotiable.
Bake seven to nine minutes. Watch them. The edges go pale gold. Not brown. Not deep. Pale. You’ll smell it change—from buttery sweet to toasted and nutty. That’s the signal.
Pull them out. Let them sit on the sheet one to two minutes. They’re fragile hot. Brittle. Once they firm up move them to a cooling rack. Cool completely. This matters. Completely.
Cream Wafer Tips and Common Mistakes
Margarine works in the dough for dairy-free but the crisp changes. Less buttery. Less crisp. Coconut oil adds tropical notes if you want that—chill it well before rolling.
Half and half in the dough instead of heavy cream? Fine. Whole milk? Works but watch the dough texture. It might be softer.
The sugar coating is essential. Not powdered sugar. Not both. Granulated. That’s what gives the crunch.
Don’t over-bake. The second they start browning you lose the wafer effect. Temperature matters more than time. Visual cues. Not a timer.
Dough cracks when you roll it? Rest it ten to fifteen minutes at room temperature. Warm your hands. Smooth the cracks gently. Keep rolling.
Filling too stiff for piping? Drizzle milk in slow. A teaspoon at a time. Too loose? Add powdered sugar. One teaspoon. Taste it—you know if it needs vanilla or salt.
Lemon zest in the dough changes everything. Orange too. Cinnamon works. Nutmeg. The filing takes matcha or cocoa powder but reduce the flour slightly if you go that way.
The pricking step prevents bubbles and lumps. Do it.
Rest the cookies after baking. Fresh from the oven they’re soft. Let them cool all the way. Then fill them. Filling melts if the cookies are warm.
Cream Wafers with Vanilla Buttercream
Prep:
35 min
Cook:
10 min
Total:
45 min
Servings:
24 servings
Ingredients
- 1 cup unsalted butter room temp
- 1 1/2 cups all-purpose flour sifted
- 3 tablespoons heavy cream or half and half
- 1/4 cup granulated sugar for coating
- Filling: 1/2 cup unsalted butter softened
- 3/4 cup powdered sugar sifted
- 1 teaspoon vanilla extract
- 1-2 tablespoons heavy cream or milk
- Pinch salt
- Optional gel food coloring
Method
- = Cookies =
- 1 Beat butter in stand mixer with paddle 4-5 minutes, pale fluffy texture vital here, start to smell faintly nutty, should lighten in color like softened cream. Use electric hand mixer manually if no stand mixer; low speed keeps air in.
- 2 Add sifted flour and cream, mix briefly until dough just comes together; over-mixing toughens cookies. Form ball, wrap tight in plastic. Refrigerate overnight or at least 8 hours. Chill firms butter, helps rolling thin without cracking.
- 3 Next day, preheat oven to 370F instead of 375F to slow edge browning, better crisp. Prepare rimmed baking sheet with parchment.
- 4 Pour granulated sugar onto shallow dish or pie plate.
- 5 Lightly flour clean counter or mat. Roll dough in small batches to thin 1/8-inch—this thickness crucial for wafer effect. Cut out with 1-inch round cutter. Transfer to sugar dish, flip each cookie and gently press sugar into both sides—adds texture, crackle.
- 6 Arrange on baking sheet spaced apart. Prick center thrice with fork, lets steam escape, keeps cookie flat. Skip pricking, cookies balloon, ruin thin shape.
- 7 Bake 7-9 minutes watching closely—edges just start to pale golden, avoid deep browning. The aroma changes from buttery sweet to toasted nuttiness. Hot cookies fragile; let sit 1-2 minutes to firm up before moving to cooling rack. Cool completely before filling, or filling melts.
- = Filling =
- 8 Beat softened butter 5 minutes until very pale, almost whipped cream texture. This takes time to aerate fully; don’t rush or cream will feel greasy.
- 9 Add powdered sugar, vanilla, salt. Beat blending fully, then add heavy cream or milk 1 teaspoon at a time until fluffiness achieved without runniness. Filling texture should hold shape but spread easily.
- 10 Divide filling if coloring, add gel colors sparingly; natural vanilla yellow can tint warm tone. Blend well.
- 11 Fill piping bag with large round tip, squeeze generous dollop on one cookie’s center. Top with second cookie, press lightly—not too hard or cream spills.
- 12 Or use small offset spatula or teaspoon. Pressing too hard will crack wafers; gentle is key.
- 13 Cookies set quickly; store in airtight container layered with parchment to prevent sticking and sogginess.
- = Tips and Substitutions =
- 14 Butter is backbone; margarine can substitute in dough for dairy-free but alters crispness, less flavor. Coconut oil adds a slight tropical note; refrigerate well for rolling.
- 15 Heavy cream can be swapped with half and half or whole milk for lighter fat dough but watch texture.
- 16 Sugar coating essential for crisp shell; powdered sugar alone won’t give crunch.
- 17 Don’t over-bake—cookies lose wafer-like texture if browning deeply. Visual cues trump timers.
- 18 If dough cracks rolling, let rest 10-15 minutes room temp or warm hands gently smooth cracks before cutting.
- 19 If filling too stiff, drizzle milk slowly; too loose add powdered sugar by teaspoon.
- 20 For flavor twist, add zest (lemon, orange) to dough or filling. Cinnamon or nutmeg in dough works too.
- 21 Works well with matcha or cocoa powder in dough if flour reduced slightly.
- 22 The pricking step critical to avoid bubbles or air pockets causing lumpy cookie surface.
- 23 Resting cookies after baking allows them to crisp up; fresh out oven they’re fragile, soft.
- 24 Fill and sandwich only when cookies fully cool to avoid melting filling.
Nutritional information
Calories
120
Protein
1g
Carbs
11g
Fat
8g
Frequently Asked Questions About Cream Wafers
Can I make the dough ahead and freeze it? Yeah. Wrap it tight. Freezer for maybe a month. Thaw in the fridge overnight before rolling. Easier than same-day rolling because the butter’s already chilled.
Why does my dough crack when I roll it? Too cold or you’re rushing. Let it warm five minutes. Roll gently. If it still cracks, rest it between batches.
What if I don’t have a stand mixer? Electric hand mixer. Low speed. Takes longer but it works. Hand whisking is brutal and probably won’t get you the pale fluffy texture you need.
Should the filling be thick or thin? Spreadable but holds shape. If it’s runny the sandwich falls apart. If it’s stiff it won’t pipe smooth. Add cream a teaspoon at a time until it’s right.
Can I use salted butter instead of unsalted? Not really. You lose control over salt. Use unsalted. Add the pinch yourself. You know how much you’re getting.
How long do they stay fresh? Three, four days in an airtight container. Layer with parchment so they don’t stick. After that the filling goes weird and the cookie starts absorbing moisture. Not bad. Just different.
What’s the difference between wafers and regular cookies? Thickness and sugar coating. Wafers are thin—that one-eighth inch. The granulated sugar stays on the outside. Creates a specific texture. Crunch, then creamy, then crisp again. It’s a whole thing.
Can I make these without the cream filling? Sure. They’re fine plain. Less interesting but not bad. They keep longer unfilled if that matters.
Why do some of my cookies puff up despite pricking? Didn’t prick deep enough or missed spots. Go all the way through. Three holes minimum. Press the fork down.
Can I sandwich them with buttercream instead? Yeah. Works fine. Change the whole flavor but the cookie stays the same. Vanilla buttercream, chocolate, whatever.
You’ll Love These Too
Explore all →
Pizza Dough Recipe with Bread Flour

Making Sugar Cookies with Cake Flour
Almond White Hot Cocoa Recipe

Crispy Asparagus Appetizer with Herb Yogurt Sauce
Chocolate Chip Cookies with Almond Meal
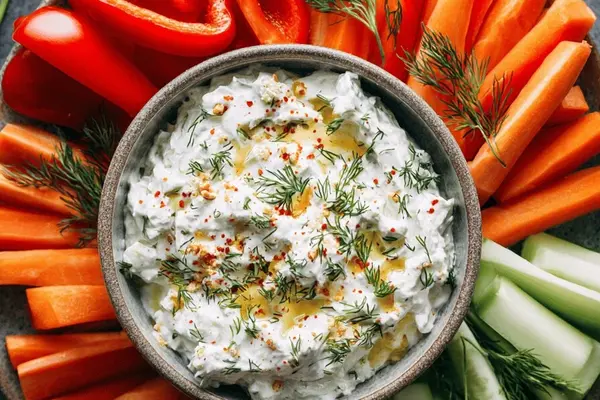
Herb Goat Cheese Dip with Greek Yogurt

Ground Turkey Breakfast Burritos

Cajun Chicken Pasta with Creamy Sauce

Grilled Eggs Recipe with Black Beans

Spicy Penne Pasta with Merguez and Harissa

Pork Parmigiana Patties with Eggplant

Grilled Pork Dumplings with Satay Sauce

Lemon Chicken Thighs with Vermouth Sauce

Balsamic Rosemary Chicken with Garlic

Orzo Salad with Peas, Apricots & Pistachios
Coffee Cake Cake with Olive Oil & Cinnamon
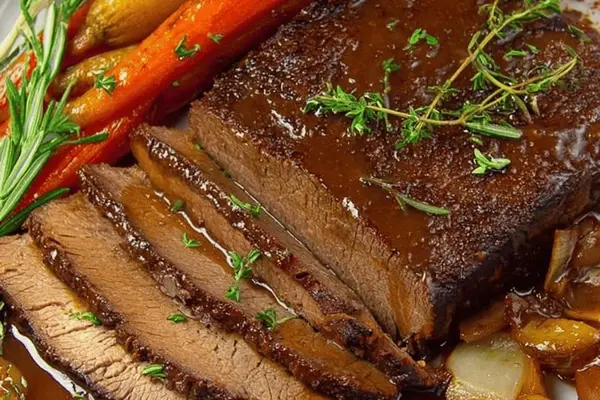
Slow Braised Brisket with Red Wine & Beef Stock
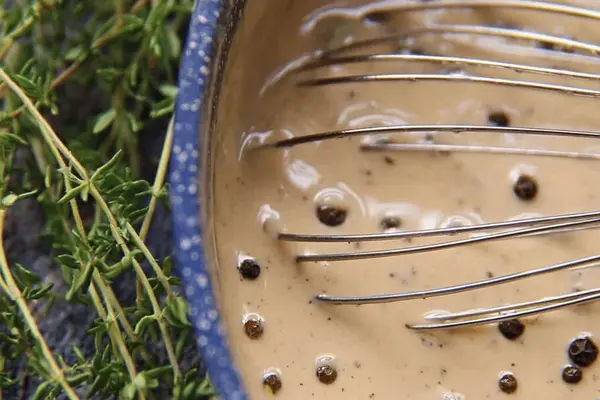
Peppercorn Cream Sauce with Whiskey

Chocolate Cupcakes with Cream Cheese Frosting
