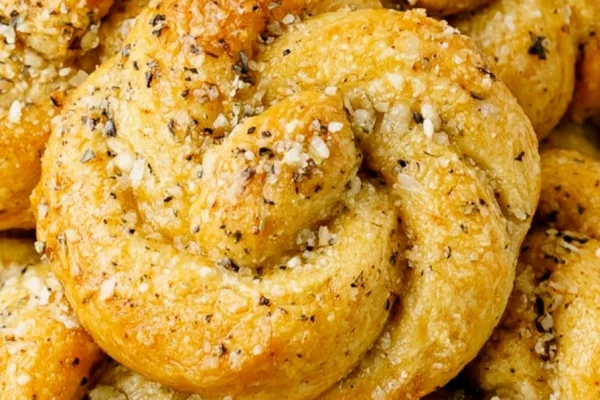
Crescent Roll Garlic Knots
By Emma
Certified Culinary Professional
·
Recipe tested & approved
I keep making these when I need something fast and I’m too lazy to deal with yeast dough. Crescent Roll Garlic Knots hit differently because they’re actually stuffed with cheese before you twist them, which means every bite has that melted mozzarella and provolone situation going on instead of just garlic butter on top.
Why You’ll Love This Recipe
- They’re done in 28 minutes, start to finish.
- The cheese is inside the knot, not just sprinkled on top, so you get that stretchy pull when you tear one open.
- No kneading or rising time because crescent dough does the work.
- That garlic butter hits twice—once before baking, once after—and it makes them taste way more intense than most garlic knots.
- You can make eight knots from two cans, which is enough for a solid Italian snack situation without making too many.
- They actually stay soft inside while getting crispy edges, which doesn’t always happen with store-bought dough.
The Story Behind This Recipe
I tested this last Tuesday after work because I had people coming over and I forgot until like 5 PM. I had crescent rolls in the fridge and some cheese, and I remembered seeing someone twist dough into knots once but they didn’t stuff them first. I figured if I sealed the cheese inside before twisting, it’d be better than just topping them.
Turns out sealing matters a lot—my first batch leaked everywhere because I didn’t pinch the edges tight enough. The second batch I really pressed those seams and they held. Now I make these instead of ordering garlic knots because it’s faster and I can control how much garlic salt goes in.
What You Need
You’ll need 2 (10.5-ounce) cans of crescent roll dough, the kind that comes in those pop-open tubes. Don’t get the sheets—you want the pre-scored triangles because they’re easier to work with when you’re pairing them up.
For the butter mixture, grab some melted unsalted butter, garlic salt, and Italian seasoning. The garlic salt does double duty here so you don’t need to add extra salt later. Italian seasoning is key because it’s got that oregano and basil thing happening that makes these taste like actual crescent roll recipes instead of just buttery bread.
Cheese-wise, you need grated parmesan for sprinkling and a shredded mozzarella and provolone blend for the inside. The blend melts better than just mozzarella alone—provolone adds this sharper bite that keeps it from tasting one-note. I tried using only mozzarella once and it was fine but kind of boring.
You’ll also want parchment paper for your baking sheet because these will leak a little no matter how careful you are with sealing. A rolling pin helps if you’ve got one, but honestly I’ve used a wine bottle before and it worked. A pastry cutter makes slicing the rectangles cleaner but a knife is fine if that’s what you have.
How to Make Crescent Roll Garlic Knots
First, get your oven going to 350°F and line a big baking sheet with parchment paper. This isn’t optional—I’ve scraped burnt cheese off sheet pans too many times to skip this step now.
Mix your melted unsalted butter with the garlic salt and Italian seasoning in a small bowl. Set it aside but keep it close because you’ll use it twice. The smell hits immediately, that sharp garlic cutting through the buttery richness.
Take two crescent roll triangles and lay them side by side so they form a rectangle. Pinch that center seam really hard—like, press it until you see the dough fuse together. If you don’t, it’ll split apart when you roll it out and your cheese will have an escape route later.
Roll the whole thing out on a pastry mat until it’s a 6 by 9-inch rectangle. I use a rolling pin and just keep pressing the seam flat as I go. Keep any triangles you’re not using in the fridge so they stay cold—warm dough is a nightmare to work with.
Slice that rectangle straight down the middle with a pastry cutter so you’ve got two long, skinny rectangles. Brush both with your garlic butter mixture, but don’t go crazy because you need some left for after they bake. Just enough to coat the surface without it pooling.
Put about 1½ teaspoons of parmesan down the center of each rectangle in a line. Then add roughly 1½ tablespoons of the mozzarella and provolone mix right on top of the parmesan. Stack it all in the middle—you’re building a cheese spine here.
Fold the dough over lengthwise from the long edge so the cheese is completely enclosed in a rope shape. Now seal everything—pinch the ends shut and press the long edge closed. If there’s even a tiny gap, cheese will leak out during baking and you’ll end up with flat garlic knots instead of puffy ones.
Twist each rope into a loose knot, but don’t pull it tight or they won’t rise properly. Space them about two inches apart on your prepared sheet. They need room to puff up and brown without touching each other.
Do this whole thing again with more triangles until you’ve got eight knots total. I found working in batches of two rectangles at a time keeps the dough from getting too soft. Cold dough holds its shape way better.
Bake them for 13 to 16 minutes, watching for that color to shift from pale to golden brown. The edges should look crispy and the tops should have some darker spots. You’ll smell the garlic and herbs getting toasty around the 10-minute mark.
The second they come out, brush them with whatever garlic butter you saved and hit them with more parmesan. This step makes them shiny and keeps the outside from drying out. They’ll smell insane at this point.
What I Did Wrong the First Time
I didn’t pinch the seams tight enough on my first try and cheese exploded out of three knots. They still tasted fine but they were flat and crispy instead of soft inside, and I had to scrape all that burnt cheese off the pan. Now I really press those edges together like I’m trying to fuse them permanently and I haven’t had a blowout since. Also I brushed too much butter on before baking and didn’t save enough for after—that second brush is what makes them taste like actual Italian snack material instead of just baked dough.
Crescent Roll Garlic Knots
Prep:
15 min
Cook:
13 min
Total:
28 min
Servings:
8 servings
Ingredients
- melted unsalted butter
- garlic salt
- Italian seasoning
- crescent roll dough triangles
- grated parmesan cheese
- shredded mozzarella and provolone cheese blend
Method
- 1 Heat the oven to 350°F and line a large baking sheet with parchment paper to catch drips and keep knots from sticking.
- 2 Mix melted unsalted butter with garlic salt and Italian seasoning in a small bowl, setting aside that pungent, herby butter mixture.
- 3 Arrange two crescent roll triangles side by side to form a rectangle, pinching the seam firmly to avoid separation. Roll this out on a pastry mat with a rolling pin into a 6 by 9-inch rectangle, pressing the seam flat as you go. Keep any extra triangles chilled in the fridge to stay firm while shaping knots.
- 4 Slice the large rectangle straight down the middle with a pastry cutter, making two narrower rectangles.
- 5 Brush the melted butter mixture lightly but thoroughly over both rectangles. You want enough left over for a final brush after baking, so don’t overdo it here.
- 6 Lay about 1½ teaspoons of grated parmesan cheese down the center of each rectangle, followed by roughly 1½ tablespoons of the shredded mozzarella and provolone mix stacked right over the parmesan, creating a cheesy core.
- 7 Fold the dough over lengthwise from the longer edge, enclosing the cheeses inside a rope. Seal both the ends and edges tightly—if not, cheese will ooze out while baking.
- 8 Twist each cheesy rope into a loose knot, careful not to compress too tightly so they stay fluffy. Place them spaced about two inches apart on the parchment-lined sheet, letting room for them to rise and brown nicely.
- 9 Repeat combining triangles, rolling, cutting, brushing, filling, folding, and knotting until you have eight knots ready. I found working in small batches keeps dough cold and easier to handle.
- 10 Bake the knots for 13 to 16 minutes, watching for that golden-brown color and a crisp, slightly crackly outer layer. You’ll smell the garlic and herbs blooming by the time they’re done.
- 11 Right out of the oven, slather the knots with the reserved garlic butter and sprinkle extra parmesan cheese on top. This last buttery brush keeps them moist and shiny, with that tossed-in-garlic aroma hitting its peak.
Nutritional information
Calories
280
Protein
7g
Carbs
18g
Fat
21g
Tips for the Best Crescent Roll Garlic Knots
Work on a cool surface if you can. Granite countertops or marble boards keep the dough from getting sticky and soft while you’re rolling it out, which makes sealing way easier.
Don’t twist the knots too many times or they’ll get dense. One loose twist is enough—they’ll tighten up a bit as they bake and you want air pockets inside so they stay soft. I twisted one batch three times once and they came out chewy instead of fluffy.
Save at least a third of your garlic butter for after baking. The post-oven brush soaks into the warm dough and makes them taste like you put garlic in every layer, not just on the surface.
Space them farther apart than you think you need to. Mine touched once during baking and I had to tear them apart, which ripped the tops and made them look ugly. Two inches minimum between each knot gives them room to puff without merging.
If your dough feels warm when you open the can, stick it in the fridge for ten minutes before you start. Cold dough holds its shape when you’re folding and twisting, and warm dough just stretches out and won’t stay sealed no matter how hard you pinch it.
Serving Ideas
I put these out with marinara for dipping when people come over and they disappear in like five minutes. The sauce cuts through the butter and adds that tomato acid thing that makes you want another one.
They’re really good next to a big salad when you want something carby but don’t want to commit to a full pasta situation. Tear one open and use it to soak up the dressing at the bottom of your bowl.
If you’ve got leftover soup, these work way better than regular bread for dunking. The knot shape holds up in broth without falling apart immediately. I’ve done this with minestrone and it was the right call.
Variations
You can swap the mozzarella and provolone for a cheddar and monterey jack blend if you want it sharper. It won’t stretch as much but the flavor’s more intense, which works if you’re not super into that mild Italian cheese vibe.
Adding a pinch of red pepper flakes to your garlic butter makes them spicy without changing anything else. Just mix it in with the Italian seasoning and you’ll get heat without losing the garlic salt backbone.
I tried stuffing them with cooked crumbled sausage once along with the cheese and it actually worked. You need to use less cheese though or they’ll burst, maybe a tablespoon of meat and a tablespoon of the blend. They took an extra two minutes to bake through but tasted like pizza rolls.
If you want them sweeter for some reason you could brush them with regular melted butter and cinnamon sugar instead of the garlic mixture, but honestly that feels like a different recipe entirely and I haven’t tested it enough to say it’s good.
FAQ
Can I use crescent roll sheets instead of triangles?
Yeah but you’ll have to cut them into triangles yourself, which takes longer. The pre-scored ones are already sized right for pairing up into rectangles. Sheets work fine if that’s all you have, just measure out roughly the same triangle size.
Do I have to use parchment paper or can I just grease the pan?
You really need parchment because even with tight sealing, some cheese will leak and it’ll burn onto your pan. Greasing doesn’t stop burnt cheese from sticking. I’ve tried both and parchment is worth it every time.
Can I make these ahead and bake them later?
You can assemble them and keep them in the fridge for maybe two hours before baking, but longer than that and the dough gets soggy from the butter. They don’t freeze well unbaked because the cheese leaks out when they thaw.
What if I don’t have Italian seasoning?
Mix your own with dried oregano, basil, and a tiny bit of thyme. The ratio doesn’t matter that much, just eyeball it. Garlic powder alone won’t give you that herby depth these need to taste like garlic knots instead of just garlic bread.
Can I use fresh garlic instead of garlic salt?
You can but you’ll need to add regular salt separately because garlic salt does both jobs. Fresh garlic burns easier in the butter too, so if you go that route, add it after you melt the butter and don’t let it sit on heat.
How do I know when they’re done baking?
They should be golden brown on top with darker edges and the bottoms should feel firm when you lift one with a spatula. If they’re still pale after 16 minutes your oven might run cool—give them another two minutes.
Why did my cheese leak out even though I sealed them?
Either your seam wasn’t pinched hard enough or your dough was too warm and stretched open during baking. Press those edges together like you’re gluing them shut and make sure the dough stays cold while you work.
Can I use just mozzarella instead of the blend?
Yeah but it’ll taste flatter. Provolone adds sharpness that keeps them from being one-note cheesy. Pure mozzarella works fine if that’s what you’ve got, just know they won’t have as much flavor complexity.
Do these reheat well?
They’re best fresh but you can reheat them in a 300°F oven for about five minutes. Microwave makes them rubbery. They lose some of their crispy edges when reheated but the inside stays soft enough.
How long do these keep?
Two days in an airtight container on the counter, maybe three in the fridge. They get drier the longer they sit. I usually just eat them all the day I make them because they’re not as good later.
Can I double the recipe?
Sure, just use two baking sheets because they need space to rise. You’ll probably have to bake them in two batches unless you’ve got a huge oven. The timing stays the same for each sheet.
What if I don’t have a rolling pin?
A wine bottle works, or really any smooth cylinder. I’ve used a water bottle before when I was at someone else’s place. Just roll from the center out and keep pressing that seam flat as you go.
Can I use a different cheese for the topping instead of parmesan?
You could use more of the mozzarella blend but parmesan adds a salty, nutty thing that makes the outside taste different from the inside. Romano works too if you want it even sharper.
Why do I need to brush them twice with garlic butter?
The first brush flavors the dough before it bakes and helps it brown. The second one soaks into the hot bread right out of the oven and makes them shiny and aromatic. Skipping the second brush leaves them dry and less garlicky.
Can I add herbs on top before baking?
You can but dried herbs might burn. If you want extra herbs, add them in the second butter brush after baking when they won’t get direct oven heat. Fresh parsley works better as a garnish after they’re done.
What’s the best way to slice the rectangle evenly?
A pastry cutter gives you a cleaner edge than a knife but either works. Just eyeball the center and cut straight down. They don’t have to be exactly even, close enough is fine for these.
Do I really need both mozzarella and provolone or can I just buy a pre-made blend?
The pre-shredded Italian blend bags at the store usually have both plus maybe some parmesan, and that’s actually easier. Just check the label to make sure it’s got mozzarella and provolone listed. I buy the blend because it’s less work than shredding two separate cheeses.
Can I use salted butter instead of unsalted?
You can but go easy on the garlic salt or they’ll taste too salty. Unsalted butter lets you control the salt level better since garlic salt already brings a lot. If salted butter’s all you have, maybe use half the garlic salt and taste your butter mixture first.
What happens if I don’t refrigerate the dough I’m not using yet?
It’ll get soft and sticky, which makes it impossible to seal properly. Warm dough tears when you try to fold it and won’t hold its shape when you twist it into knots. Keep those triangles cold until you’re ready to work with them.
You’ll Love These Too
Explore all →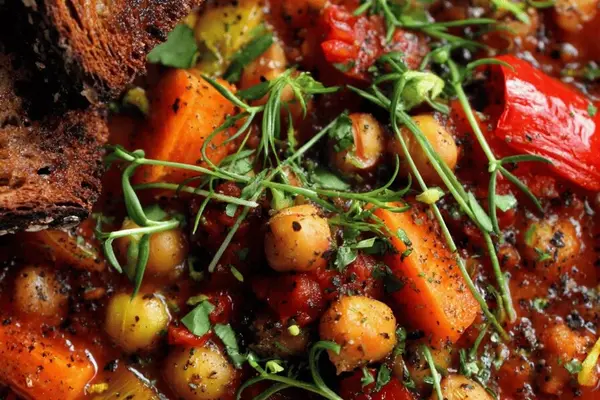
Roasted Veggie Soup with Chickpeas & Thyme

Lemon Raspberry Bars with Coconut Oil Shortbread
Ricotta Cheesecake with Honey & Cinnamon
Peach White Chocolate Risotto Recipe
Juicy Ground Chicken Burgers

No Bake Coconut Cream Cheese Bars
Marinated Chicken With Yogurt & Chickpeas
Pomegranate Ginger Jelly with Agar-Agar
Grilled Garlic Butter Shrimp with Herb Butter
Grilled Cheese Sloppy Joe with Ground Beef
Beer Battered Fish Recipe with Cod
Hard Boil Quail Eggs with Tarragon Mayo
Braised Beef with Peppers and Cherry Tomatoes
Ground Beef Tacos with Chili Powder & Cumin
Curry Omelette Breakfast Sandwich Recipe
Stuffed Peppers Recipe with Quinoa
Wild Mushroom Risotto Mix in a Jar
Roasted Brussels Sprouts with Bacon Dressing

Easy Amaretto Chocolate Truffles with Coconut
