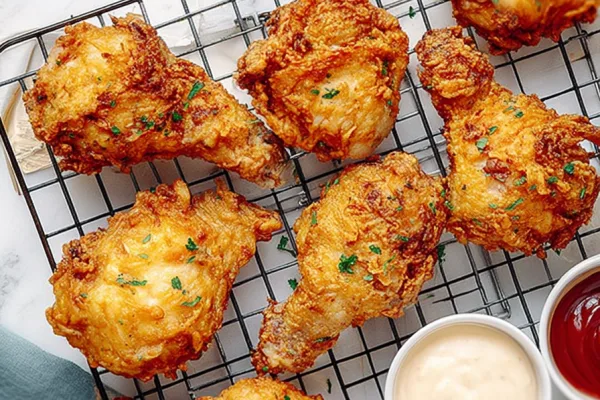
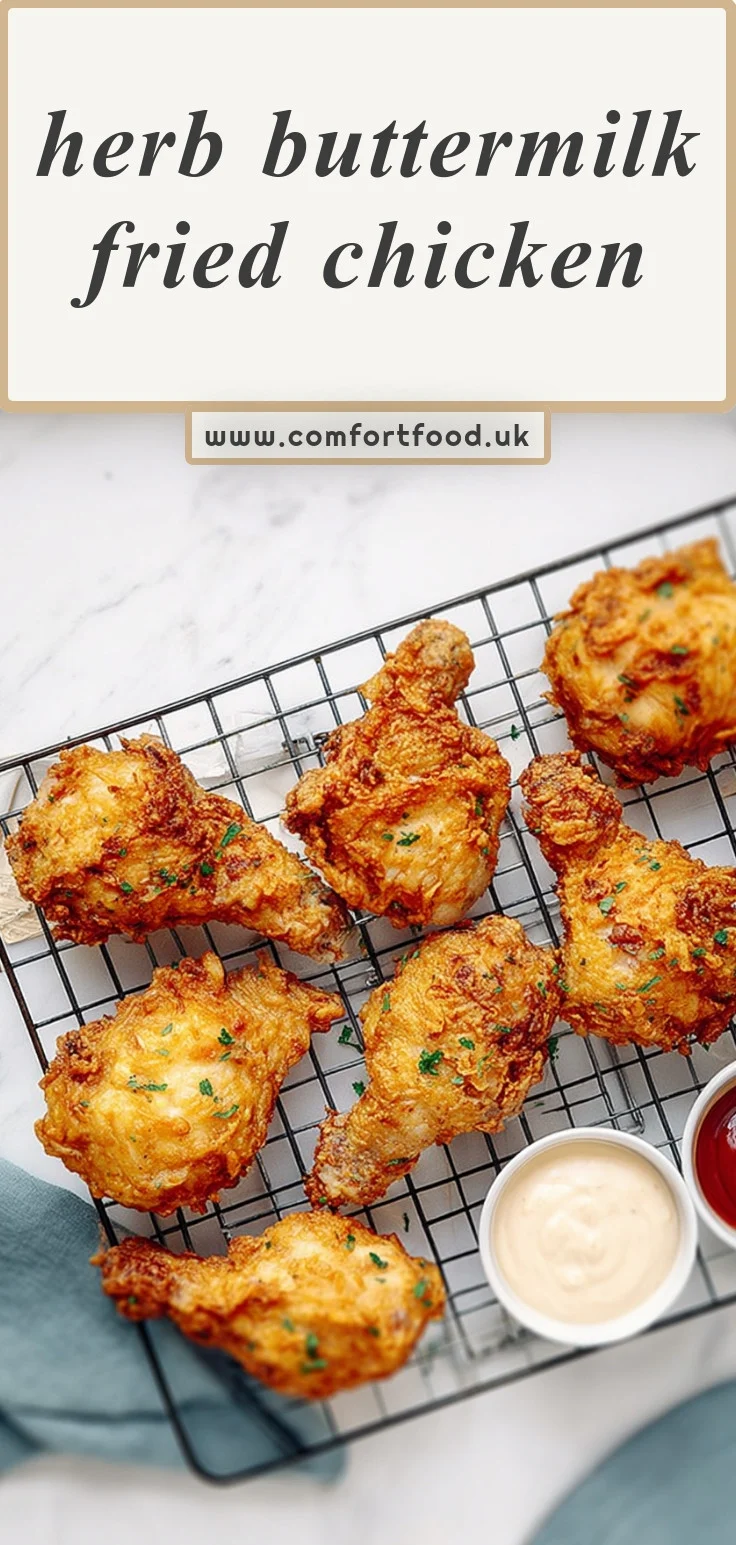
Herb Buttermilk Fried Chicken
By Emma
Certified Culinary Professional
·
Recipe tested & approved
Herb and Buttermilk Brined Fried Chicken uses a spiced brine with rosemary, celery salt, and bay leaves, soaking chicken for 12-24 hours. Coated in a seasoned flour-cornstarch mix, then fried crisp and kept warm in the oven with steady oil temperature control.
Prep:
45 min
Cook:
30 min
Total:
15h 15min
Servings:
6 servings
I think I figured out buttermilk fried chicken finally. The herb brine sits for 12 hours minimum and you actually taste the rosemary in there, not just salt.
Why You’ll Love This Recipe
- The celery salt and rosemary brine does something different than regular buttermilk soaks
- Cornstarch in the coating makes it crispier than flour alone
- You can hold finished pieces in a 300°F oven for an hour without losing crunch
- The garlic and onion get grated into a pulp, not chopped, so they dissolve into the brine
- Oil temperature matters more than I thought—350°F dropping to 300°F keeps the crust from burning
- Chilling the coated chicken before frying isn’t optional if you want thick crust
The Story Behind This Recipe
I made this last Tuesday after work because I had buttermilk that was about to turn and a whole chicken I broke down Sunday night. Honestly I was just trying to use what I had.
The herb thing happened because I grabbed rosemary instead of thyme by accident and the celery salt was already in my mortar from something else. I didn’t wipe it out.
It worked better than the regular buttermilk soak I’ve been doing for years so now this is the version I’m sticking with. Sometimes you stumble into something that just makes sense.
What You Need
You’ll need celery salt twice in this. Once for the brine and once for the coating. Don’t skip it because that’s what gives you the baseline savory thing under everything else. The dried rosemary gets crushed with bay leaves and black pepper in a mortar, and if you don’t break it down it just floats around doing nothing.
Four cloves of garlic and one small onion go into a pulp. Not chopped. You want them dissolved into the buttermilk so every piece of chicken gets coated evenly instead of having random chunks stuck to the skin. I use a microplane for the garlic because my food processor is annoying to clean.
You need 4 cups of buttermilk for the brine along with kosher salt and sugar to balance the acid and help with browning later. The sugar also keeps the chicken from drying out during the long soak which is 12 to 24 hours in the fridge.
For coating you’ll mix 2 cups all-purpose flour with half a cup cornstarch. The cornstarch is what makes this crispier than regular buttermilk chicken. Add onion powder, paprika, more celery salt, baking powder for extra crunch and white pepper because it doesn’t leave black specks. You’ll fry in neutral oil, either vegetable or peanut, about an inch deep in a heavy skillet.
How to Make Herb Buttermilk Fried Chicken
Crush the celery salt, dried rosemary, black pepper and bay leaves in your mortar until they’re broken down into smaller bits that’ll actually dissolve. Put that into a big freezer bag and set the bag in a bowl so it stands up on its own. This makes the next part way easier.
Grate your garlic and onion into a pulp. I mean really grate it until it’s almost liquid. That wet paste goes right into the bag with your crushed spices. Pour in the cold buttermilk, then add your kosher salt and sugar. Squish everything around inside the bag until the salt and sugar disappear.
Rinse your 3 pounds of chicken pieces and pat them sort of dry. Toss them in the bag and massage the brine into every part. Seal it and put it in the fridge for at least 12 hours but honestly 24 is better if you have time.
When you’re ready to fry, mix your flour, cornstarch, onion powder, paprika, celery salt, baking powder and white pepper in another big bag. This is your coating and it needs to be mixed well so you don’t get pockets of plain flour.
Pull the chicken out of the brine about 90 minutes before you want to eat. Pick off any big herb chunks but leave some buttermilk on there. It helps the flour stick. Drop a few pieces into the flour bag, seal it and shake hard until they’re completely covered. The sound of it is honestly satisfying.
Set the coated pieces on a wire rack and put them back in the fridge for 30 to 60 minutes. This step sets the coating so it doesn’t just slide off in the oil. I learned that one the hard way.
Heat your oven to 300°F and put a wire rack on a rimmed baking sheet. You’ll hold finished pieces there. Get about an inch of oil heating in a heavy skillet or cast iron to 350°F. Use a thermometer because guessing doesn’t work. When you add the chicken it’ll drop to around 300°F and that’s where you want to keep it.
Fry in batches with pieces spaced out. Don’t crowd them or the oil temperature crashes. Don’t move them for the first 4 or 5 minutes or you’ll wreck the crust before it sets. Fry for about 12 minutes total, flipping once halfway through. The crust should be golden and making those crackling sounds. Check that the thickest part hits 160° to 165°F inside.
Move finished pieces to the rack in the oven. They’ll stay crispy in there for up to an hour at 300°F without getting soggy. Fry the rest of your batches the same way.
What I Did Wrong the First Time
I didn’t chill the coated chicken before frying and half the coating just fell off into the oil. It made a mess and left bald spots on the skin that weren’t crispy at all. I thought I could skip that step to save time but it’s actually not optional if you want a thick even crust. The coating needs to firm up in the fridge or it just doesn’t hold when it hits hot oil.
Herb Buttermilk Fried Chicken
Prep:
45 min
Cook:
30 min
Total:
15h 15min
Servings:
6 servings
Ingredients
- 1 tablespoon celery salt
- 1 teaspoon dried rosemary
- 1 teaspoon freshly ground black pepper
- 2 bay leaves
- 4 cloves garlic
- 1 small onion
- 4 cups buttermilk
- 1/4 cup kosher salt
- 2 tablespoons sugar
- 3 pounds chicken pieces, rinsed
- 2 cups all-purpose flour
- 1/2 cup cornstarch
- 1 teaspoon onion powder
- 1 teaspoon paprika
- 1 tablespoon celery salt
- 1 teaspoon baking powder
- 1/2 teaspoon white pepper
- neutral oil for frying (vegetable or peanut recommended)
Method
- 1 Grab a mortar and pestle or spice grinder; crush celery salt, dried rosemary, freshly ground pepper, and bay leaves together until broken down into small bits. Transfer this aromatic mix into a large, resealable freezer bag. Nest this bag in a bowl so it stands upright and is ready to hold your chicken and liquid later.
- 2 Use a microplane or pulse garlic cloves and onion in a food processor until they form a rough pulp. Add this pungent, wet mixture to your spice blend inside the bag. Pour in the cold buttermilk along with kosher salt and sugar. Whisk everything inside the bag together, breaking up clumps and evenly dispersing salt and sugar.
- 3 Pat dry your rinsed chicken pieces slightly then toss them into the bag. Massage the brine into every nook of the chicken; that’s crucial for flavor penetration. Zip the bag shut and shove it into the fridge for 12 to 24 hours – the longer the better, but not less than 12.
- 4 When ready to dredge, mix together flour, cornstarch, onion powder, paprika, celery salt, baking powder, and white pepper in a separate large resealable bag. This dry mix will build the crunch and flavor crust.
- 5 About 90 minutes before cooking, pull chicken out of the brine bag. Remove any big herb bits stuck to the skin, but don’t wipe off all the buttermilk — a touch helps the coating stick.
- 6 Drop chicken pieces into the flour mixture bag in small batches, seal, and shake vigorously until every surface is coated with that flour-cornstarch blend. The satisfying sound of flour pummeling chicken is the audible sign of thick crust building.
- 7 Set coated chicken on a wire rack and slide it back in the fridge for 30 to 60 minutes. This step helps the coating set, prevents too much flour from falling off when frying, and densifies the crust.
- 8 While chicken chills, preheat your oven to 300°F and place another wire rack on a large, rimmed baking sheet to catch drips and keep cooked pieces off direct heat.
- 9 Heat about 1 inch of oil in a heavy skillet or cast iron pan to 350°F. Look for a shiny surface sheen signaling it’s hot. A deep-fry thermometer is essential here. Adding chicken will drop your oil to roughly 300°F; keep the heat steady there for even cooking.
- 10 Work in batches to avoid overcrowding; place several chicken pieces in oil spaced 1-2 inches apart so the sizzling stays loud and lively rather than muffled. Don’t move the chicken once in the oil for at least 4-5 minutes — early stirring ruins the crust.
- 11 Fry chicken around 12 minutes total, flipping once halfway through. Crust should turn golden brown and crisp with audible crackles from frying skin. Check doneness by piercing thickest part; internal temperature must sit between 160° and 165°F.
- 12 Transfer cooked chicken to the wire rack on the baking sheet and immediately slide into the warm oven to maintain crispness without stewing in residual oil.
- 13 Repeat frying the remaining batches. Serve hot straight from the oven or hold them at 200°F warming temperature for up to an hour. A 10-minute rest after removal allows the juices to redistribute without sogginess.
- 14 Have your own showdown with this method? Drop your experience, tweaks, or results in the comments below.
Nutritional information
Calories
450
Protein
30g
Carbs
32g
Fat
25g
Tips for the Best Herb Buttermilk Fried Chicken
The oil makes noise when it’s ready. Listen for it. When you drop the first piece in and it immediately starts crackling loud, that’s 350°F without checking the thermometer again.
Don’t shake off all the buttermilk before flouring. You want some wet patches still on there because that’s what grabs the flour and builds up those thick crusty ridges instead of a thin even coating. The lumpy uneven spots are actually what you’re going for.
Your oil darkens as you fry more batches. That’s the flour and little bits cooking in there. Strain it between batches if it starts looking muddy or your last pieces will taste burnt even when they’re not.
The chicken keeps cooking after you pull it out. I pull mine at 160°F internal and it coasts up to 165°F while it sits on the rack. If you wait until it hits 165°F in the pan it’ll be dry by the time you eat it.
White pepper tastes different than black and it matters here. It’s got this sharper thing that cuts through all the buttermilk fat without leaving visible specks on the crust.
Serving Ideas
I put it on white bread with pickles and hot sauce like a gas station sandwich but better. Two slices, some dill chips, a good squeeze of Frank’s and that’s it.
Mashed potatoes with the chicken on top so the drippings soak in work if you’re feeding people who want an actual meal. Cole slaw on the side but not the creamy kind, the vinegar kind that cuts through all that fried coating.
Cold fried chicken for breakfast the next morning is why I make extra. Straight from the fridge with black coffee.
Variations
You can swap the rosemary for thyme if you want something less piney. Use the same amount of dried thyme and crush it the same way. It’s milder but it still works with the celery salt.
Spicy version just needs cayenne in the flour mix. Start with a teaspoon and go up from there. The buttermilk brine cools it down some so you can add more than you think without it getting ridiculous.
Boneless thighs fry faster, maybe 8 minutes instead of 12, and they’re easier to eat but you lose the bone flavor. I do this when I’m making sandwiches and don’t want to deal with bones.
Baking instead of frying doesn’t really work with this coating. I tried it at 425°F on a rack and it just dried out the flour without crisping it up right.
FAQ
Can I use regular milk instead of buttermilk?
Not really. The acid in buttermilk is what breaks down the chicken proteins during the long soak and that’s the whole point of the brine. You could add lemon juice or vinegar to regular milk but just buy buttermilk.
How long does the fried chicken last in the fridge?
3 or 4 days in an airtight container. The crust gets soft in the fridge no matter what you do but you can reheat it in a 375°F oven for 10 minutes to crisp it back up some.
Can I freeze the chicken after brining but before frying?
Yeah, drain off most of the buttermilk first and freeze the pieces flat in a freezer bag. Thaw them in the fridge overnight then coat and fry like normal. I’ve done this and it works fine.
What if I don’t have a mortar and pestle?
Put the spices in a ziplock bag and smash them with a rolling pin or the bottom of a heavy pan. You just need them broken down so they’re not whole pieces floating around doing nothing.
Can I reuse the frying oil?
Once or twice if you strain it through a fine mesh strainer or cheesecloth into a container after it cools. Store it in a cool dark place. If it smells off or looks really dark just toss it.
Why does my coating fall off even after I chilled it?
You probably shook off too much buttermilk before flouring. The chicken needs to be wet for the flour to stick and build up layers. Also make sure you’re not moving the pieces around in the oil before the crust sets.
Can I make the brine without the celery salt?
You’d lose the specific flavor that makes this version different from regular buttermilk chicken. Regular salt works but then it’s just another buttermilk brine recipe and not this one.
What’s the smallest amount of oil I can use?
About an inch deep minimum or the chicken pieces won’t cook evenly. You need enough oil that it comes up the sides when the chicken goes in but doesn’t overflow when it bubbles.
How do I know when the oil is too hot?
If you see smoke coming off it or if the coating burns dark brown in under 2 minutes it’s too hot. Drop it down to medium or pull the pan off heat for a minute to cool it.
Can I brine the chicken for less than 12 hours?
It won’t be as tender or flavorful. 8 hours minimum if you’re really short on time but 12 is where the rosemary and garlic actually penetrate the meat instead of just sitting on the surface.
Why add sugar to the brine?
It balances the acid from the buttermilk and helps with browning when you fry. It also keeps the meat from drying out during the long soak because sugar holds moisture.
Do I need to use a wire rack or can I use paper towels?
Wire rack is better because it lets air circulate under the chicken. Paper towels make the bottom soggy because steam gets trapped. I learned that one the second time I made this.
What if my chicken is browning too fast but isn’t cooked inside?
Your oil’s too hot. Drop the heat and let the temperature come down to 300°F before you add more pieces. Use your thermometer constantly, not just once at the start.
Can I use chicken breasts instead of pieces?
They’ll dry out easier because breasts have less fat. If you do use them, pound them to even thickness first and pull them at 160°F internal. They’re not my first choice for this.
Why does my crust look pale even though it’s cooked?
Not enough sugar in the brine or your oil wasn’t hot enough at the start. The initial sear at 350°F is what gives you color before the temp drops to 300°F for cooking through.
What does the cornstarch actually do?
It crisps up harder than flour alone because it absorbs less oil and creates a lighter crunchier texture. Half a cup mixed with 2 cups flour is the ratio that worked for me.
Can I add hot sauce to the brine?
Yeah but it’ll make the chicken spicier obviously. A few tablespoons of Frank’s or similar won’t mess up the brine chemistry. The vinegar in hot sauce is just more acid.
How do I store leftover buttermilk brine?
Don’t. It’s got raw chicken juice in it. Toss it. The used frying oil you can keep but the brine gets dumped after you pull the chicken out.
You’ll Love These Too
Explore all →
Baked Chicken Wings with Smoked Paprika
Cheesy Basmati Arancini with Cheddar Béchamel
Mediterranean Avocado Dip with Crispy Pita Chips
Creamy Ham and Potato Bake with Brie
Pistachio Layer Cake with Honey Buttercream
Ham With Apricot Glaze Recipe
Fudgy Brownies with Chocolate Ganache
Meat and Broccoli Meatballs with Panko
Slow Cooker White Chicken Chili Recipe
Rustic Tomato Basil Sauce with Fresh Garlic
Grilled Chicken Fajitas

Herbed Potato Salad

Copper Mule Drink Recipe with Bourbon

Peanut Noodle with Tofu and Green Beans
Cashew Brittle Recipe with Baking Soda
Cheesy Churros with Cheddar & Pecorino
Vegetarian Slow Cooker Meals with Potatoes
Pork Tenderloin Marinade with Tamarind

Monster Rice Treats with Candy Eyes