Homemade Coconut Milk
By Emma
Certified Culinary Professional
Before You Start
Ingredients
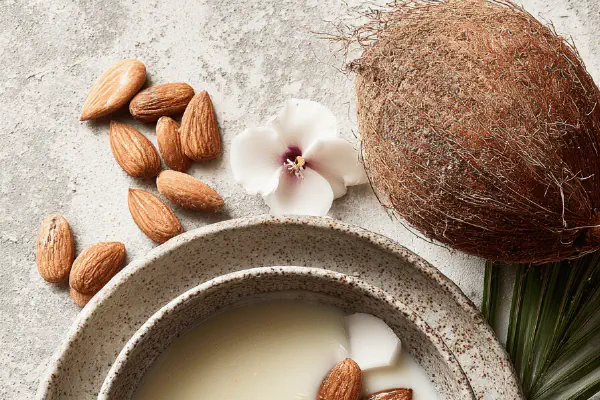
- 1 fresh young coconut about 450 to 590 grams
- 480 ml hot water (nearly boiling) substitute with almond milk for twist
In The Same Category · Beverages
Explore all →About the ingredients
Method
- Open coconut cracking hard shell; extract white flesh with a sturdy spoon or knife. Tap repeatedly, pry carefully to preserve flesh integrity.
- Coarsely chop flesh on cutting board. No need to be neat; chunks should be manageable for blender blades.
- Pour hot water in blender jug, add coconut chunks immediately while water still steaming. Blend on high for 2 to 3 minutes watching mixture turn creamy and frothy. Stop before overheating blender motor.
- Set fine sieve or nut milk bag over bowl. Pour blended coconut slurry. Press firmly with back of ladle or squeeze cloth thoroughly. Liquid runs clear of pulp; stop pressing once no more drips form.
- Transfer strained milk to airtight container. Let chill or refrigerate ASAP. Cream rises atop; stir gently before use to reincorporate.
- Optional: save pressed pulp for baking or drying; great fiber booster.
- Expect about 400 ml fresh milk; yield varies with coconut size and water amount.
Cooking tips
Chef's notes
- 💡 Start with cracking hard shell; tap gently along edges not to break flesh. Use a sturdy spoon or butter knife to pry chunks out—patience matters. Too fast means shell bits mix in, spoiling texture. White flesh should feel firm moist. Chop coarse. Smaller bits clog sieve quicker; big chunks blend unevenly. Watch blender motor; stop if whining starts—overheating kills aroma. Press slurry thoroughly; liquid runs clearer with firm pressure. Don’t rush strain step; fibrous pulp still holds bit fat. Save pulp for baking or drying; fiber and slight coconut taste remain. Refrigerate milk fast; creamy fat rises on top, stir gently before use to keep texture consistent.
- 💡 Hot water must be nearly boiling not just warm. Lukewarm fails to extract fats fully; milk turns thin, watery. Using almond milk instead adds creaminess and nutty flavor without overpowering but skip if allergic or strong nut taste unwanted. Pour chopped flesh directly into blender with hot water; soak times waste flavor. Blend 2 to 3 minutes on high, watch frothy cream form with small bubbles. If too long motor strains or Mixer hums loud stop immediately, blend in shorter bursts if needed. Strain quickly using nut milk bag or fine mesh. Cloth layers work but soak pulp and press firmly to avoid waste. Store milk up to 3 days chilled; sour smell or separation past cream means discard.
- 💡 Check coconut for freshness by weight first, shake for rattle. Heavy relative to size indicates good flesh inside. Smell raw flesh before chopping; sweet coconut scent only. Sour or musty means discard. Use sharp knife for chopping; uneven pieces slow blending and clog sieve. Blender quality counts; low power leaves stringy pulp and weak milk extraction. Speed control helps; keep blending steady not frantic. Nut milk bags save slurry pressing effort but cloth easier on hands if you lack. After straining press pulp hard with ladle’s back, twisting motion works best. Cream layer after chilling often thickens, scoop separately for richer taste or fold back gently into milk before drinking or cooking.
- 💡 Don’t toss leftover pulp. Can dry in low oven for flour substitute or add wet to cookies, granola for fiber boost. Moisture content varies by coconut age and water ratio; young coconuts have more water and less flesh—milk becomes thinner. Mature coconuts consistently yield richer milk. Always use airtight containers for storage. Temperature variations affect fat layer separation and shelf life. Strain milk fresh always; no additives means quicker spoil. Hot water extraction pulls out fat and fibers, but don’t exceed blender time or heat from friction dulls flavor fast.
- 💡 Blend slurry while hot but not boiling to avoid cooking mixture. Stop blender when creamy and frothy but before bubbles break down too much—keeps fresh aroma. Pour immediately through strainer; warm slurry extracts fat easier. Pressing pulp hard extracts richer milk; watery juice means weak pressing or too coarse chopping. Refrigerate milk ASAP. Fat layer settles on top within hours; stir gently for homogenous texture. Leftover pulp texture varies; smaller chopping bits clog strainers but yield max milk. Store pulp frozen if needed for long term. Blend almond milk substitution creates smoother milk but watch for heavier blending time.
Common questions
What if coconut is too young?
Milk runs watery; less flesh to extract fat. Try older coconuts around 450-590 grams shell weight. More meat means creamier milk. Young coconuts better for drinking fresh water but weak milk. Substitute with more coconut chunks or less water to thicken.
Can I use cold water instead of hot?
No. Hot water key to fat and fiber extraction; cold leaves thin, bland milk. Almond milk works as warm substitute, adds creaminess without overpowering. Cold water results in poor separation; fat doesn’t rise well. Lukewarm water fails too—keep near boiling but not scorching.
Why does milk separate or taste bitter?
Over-blending overheats mix; friction heat breaks down fresh aroma, can cause bitterness. Stop blender at frothy creamy stage. Weak pressing leads to watery milk too. Also check coconut freshness; sour or musty smell ruins flavor. Store in airtight container, refrigerate ASAP. Use within 3 days.
How to store coconut milk properly?
Use airtight jars. Refrigerate immediately. Cream layer forms fast; stir before use to redistribute. Use within 3 days max. Can freeze but texture changes; thawed milk needs shaking. Leftover pulp store separately; dry for baking or freeze fresh. Avoid exposure to air to prevent spoilage.


