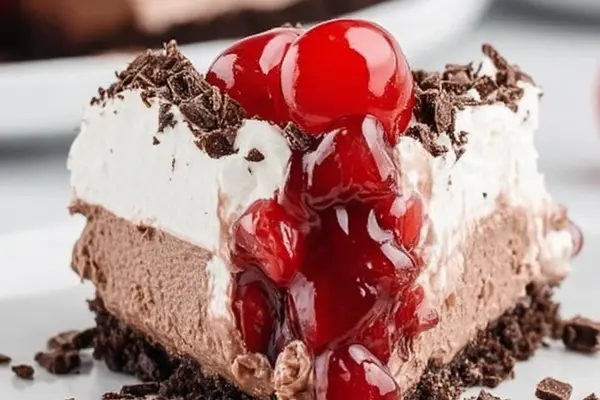
No-Bake Black Forest Cheesecake with Oreo Crust
By Emma
Certified Culinary Professional
·
Recipe tested & approved
Crust already out. Cream cheese needs to hit room temp first—no lumps, no excuses. This no-bake cheesecake sits for 7 hours minimum, and that wait is where the magic actually happens. Black Forest gets remixed here: chocolate base, whipped cloud on top, cherries piled in the middle. No oven. No stress.
Why You’ll Love This No-Bake Cheesecake
Takes 20 minutes to put together. Then you just wait.
No oven means no heat cranking. Kitchen stays cool. Apartment doesn’t smell like baking for days.
Chocolate cheesecake texture comes out dense but still light—that whipped topping does the work. Sour cream keeps it from tasting like sugar with dairy.
Works for literally any occasion. Potluck, weeknight, someone’s birthday. Nobody knows you made it in your kitchen without turning anything on.
Tastes better the next day. Maybe the day after that. Flavors soak together overnight.
What You Need for No-Bake Cheesecake With Cream Cheese and Chocolate
One pre-made pie crust. Oreo works. Graham cracker works. Skip it and you’re baking a base instead—not the point here.
Cream cheese. Sixteen ounces. Softened. Room temperature. Cold cream cheese means lumps. Lumps mean starting over.
Sugar and sour cream. Two-thirds cup sugar, half a cup sour cream. The sour cream’s doing two jobs: adding tang and keeping the whole thing from being too dense. Cut the sugar back to half a cup if you’ve got a sweet tooth that’s already satisfied by cherries and crust.
Vanilla extract. Pure. One teaspoon. Don’t cheap out.
Three ounces semi-sweet baking chocolate, chopped small. Not cocoa powder. Not chocolate chips. An actual bar, broken down. Melts smoother.
Whipped topping. One cup, thawed. Store-bought. Divided in half. You could use real whipped cream but the store stuff is forgiving—it holds structure better when you fold it in.
Cherry pie filling. One heaping cup. Canned. Mostly cherries, not syrup. Drain the excess liquid or everything gets soggy.
Chocolate pieces and coconut oil for curls. Half a cup chocolate, one teaspoon oil. The oil keeps them pliable.
How to Make No-Bake Chocolate Dessert
Start with the crust. Plastic cover comes off. Check for cracks. If you went graham cracker instead of Oreo, press it down firm into the plate. Soggy edges happen when you don’t.
Cream cheese and sugar go into a big bowl. Hand mixer, medium speed, about 55 seconds. You want it pale and fluffy—no grainy texture, no overbeating or it gets hot and breaks. Visual matters here. When it looks light and doubled in volume, stop.
Sour cream and vanilla get mixed in next. Another 25 seconds. Just enough to combine fully. The sour cream’s the secret to tasting less like sweetened paste and more like actual cheesecake.
Now split everything in half. Two equal bowls. This is where you build the two-layer effect. Each gets the same amount.
Semi-sweet chocolate goes into a microwave-safe bowl. Rough chop it first. Sixty percent power, 55 seconds. Stir. If it’s not completely smooth, hit it again for 35 to 50 seconds at the same power. Shiny, no lumps.
Fold that melted chocolate into the first cream cheese bowl. Gentle folding, spatula scraping bottom to top, rotating the bowl as you go. You want it uniform chocolate color, glossy, thicker than it was. No beating. Folding preserves air.
Whipped topping gets split between both bowls now. Half goes to each. Same gentle folding technique. Spatula, bottom-to-top, rotating. This part matters—overmix and the whole thing deflates. The chocolate layer gets denser, the plain layer stays light. Both keep that air.
Spread the chocolate mixture into the crust first. Use an offset spatula. Tap the pie plate gently to settle any pockets of air. Level it out. This is your foundation.
Plain mixture on top. Smooth and even. No thick spots, no thin spots. Similar to frosting a cake layer but you’re being more careful here. No crumbs allowed.
Grab that plastic lid from the crust package. Flip it over—it becomes the perfect pie cover. Tight fit. Refrigerate for at least 7 hours. Eight to ten is better. Overnight’s ideal. The texture firms, the flavors meld. If you’re in a rush, 6 hours works but the pie will be softer when you slice it. Patience pays here.
How to Get No-Bake Cheesecake With Oreo Crust Perfectly Set
After 7 hours minimum, the pie’s firm enough to handle. Center gets the cherry filling. Mound it in the middle, leave a 1.5-inch border so there’s room for chocolate curls around the edge. Drain most of the syrup first—that’s the difference between a firm crust and a soggy mess. Just the plump cherries matter. Scatter them or pile them, doesn’t matter. They’re the garnish and the flavor hit at the same time.
Chocolate curls are the finishing move. Semi-sweet chocolate pieces and coconut oil together in a microwave bowl. Fifty seconds, full power. Stir it smooth. Should be glossy and pourable but not runny—thinner than peanut butter, thicker than cream.
Pour that onto a rimmed baking sheet flipped upside down. Spread it thin and even with your offset spatula. About an eighth of an inch thick. Thicker than that and the curls crack instead of curl.
Freeze for 4 to 6 minutes. Touch test: light pressure should leave a slight impression but no actual dent. Still pliable, not frozen solid. Temperature’s critical here. Too cold and everything shatters. Too warm and there’s no shape.
Sharp straight spatula pushed up from the bottom edge in small sections. That releases the curls. If the chocolate fractures instead of curling, leave it out 2 minutes and try again. You’re looking for that in-between zone.
Curls stay on a freezer-safe plate in the freezer until serving. Place them gently on the pie rim just before people eat. They add texture and a subtle snap that matters more than you’d think.
The whole thing—filling, setting time, curls—works because you’re not fighting heat. Cold just makes everything denser and better. Sour cream cuts through the richness. Semi-sweet chocolate doesn’t overshadow the cherries. And folding, not mixing, keeps everything light enough that slicing actually works.
No-Bake Cheesecake Tips and Common Mistakes
Lumpy cream cheese ruins everything. Room temperature. Actually soft. Not cold, not melted. Just soft enough that your finger leaves an impression.
Folding technique separates people who make this twice from people who make it once and never again. Overmix and the whole thing deflates. Spatula, bottom of the bowl, up and over, rotate. Gentle. Do not rush.
The plastic crust lid actually fits. It’s not a coincidence. Use it. Tight cover prevents freezer burn and weird flavors leaking in.
Seven hours is the minimum. It’s not a suggestion. Less than 6 and you’re slicing soup. 7 and it’s perfect.
Cherries need draining. Soggy crust at the base is the only real mistake here. Excess syrup pools, the Oreo or graham absorbs it, texture goes wrong. Drain it.
Chocolate curls will crack sometimes. Broken shards still taste the same. Keep a dollop of whipped cream nearby to cover the sad spots.
If the crust somehow cracks or has a hole before you fill it, seal it with a thin layer of the melted chocolate from the curl step. Freezes, holds. Works fine.
No fresh whipped cream on hand? The store-bought whipped topping is actually better here anyway. Structure stays tighter when you fold it. Real cream deflates faster and makes the layers wetter.
Black Forest is cherries and chocolate. That’s the rule. You could swap the cherry filling for raspberry jam or chocolate ganache, but the point is the contrast. Don’t overthink it.
No-Bake Black Forest Cheesecake with Oreo Crust
Prep:
20 min
Cook:
0 min
Total:
7h 20min
Servings:
8 servings
Ingredients
- 1 pre-made Oreo cookie pie crust; or graham cracker crust for milder base
- 16 ounces cream cheese; softened to room temp, no lumps
- 2/3 cup granulated sugar; cut back to 1/2 cup if you like less sweet
- 1/2 cup sour cream; full fat for richness
- 1 teaspoon vanilla extract; pure, always
- 3 ounces semi-sweet baking chocolate bar; chopped into small chunks
- 1 cup thawed whipped topping; Divide into two equal portions; use cream or non-dairy
- 1 heaping cup canned cherry pie filling; mostly cherries, drain excess syrup
- 1/2 cup semi-sweet chocolate pieces; for curls
- 1 teaspoon coconut oil; substitute vegetable shortening for curls
Method
- 1 Prepped the crust first. Removed its plastic cover, set it aside, no cracks or holes in crust. If graham crackers, press firmly into pie plate with flat bottom to avoid soggy edges later.
- 2 In large bowl, cream cheese and sugar whipped with hand mixer medium speed about 55 seconds or until fluffy but not overbeaten. Important not to heat mixture or get grainy. Visual: pale lighter, some volume, no sugar grains visible.
- 3 Add sour cream and vanilla. Mix another 25 seconds. Careful to combine fully. The sour cream adds acidity and moisture, keeps batter tangy, balances sugar.
- 4 Divide the mixture equally into two big bowls. Splitting flavors here. Each mixture the same weight — eye it or use scale.
- 5 Into a small microwave-safe bowl, rough chopped semi-sweet chocolate heated at 60% power for 55 seconds. Stir. If not smooth, zap another 35–50 seconds same power. Stir until melted, shiny, no lumps.
- 6 Fold melted chocolate gently into first half cream cheese bowl. Watch folding technique; no beating or mixing too fast. You want marbled effect gone, uniform color, glossy sheen. Texture thicker now, more dense.
- 7 Equally divide thawed whipped topping between the two bowls. Gentle folds with spatula, bottom-to-top turning, rotating bowl, keeping air in. Do not rush or batter deflates, and it loses that light levity. The white layer stays delicate, fluffy; chocolate more robust but still airy.
- 8 Spread chocolate layer evenly into cookie crust base. Use offset spatula, tap pie plate gently to settle air pockets. No lopsided edges. Chocolate layer a firm base for white.
- 9 Top that with the plain mixture; smooth out carefully, even thickness, clean edges. Take time here. Similar to frosting cake layer, but no crumbs allowed.
- 10 Take the plastic lid from crust package. Flip it over; it fits perfectly like pie lid. Cover pie tightly. Refrigerate minimum 7 hours; 8 to 10 hours best overnight. Texture firms up; tastes meld and deepen. If hurry, 6 hours okay but slice carefully.
- 11 When pie is chilled, mound cherry pie filling into the center. Leave 1.5 inch border rim for curls. Drain most syrup; soggy edges ruin firm crust. Plump cherries pile, not scatter.
- 12 For curls: toss semi-sweet chocolate pieces with coconut oil in microwave-safe bowl. Microwave 50 seconds full power. Stir melting chocolate; glossy, pourable but not runny.
- 13 Pour melted chocolate onto rimmed baking sheet inverted (bottom side up). Spread thin and even with offset spatula. Layer no thicker than 1/8 inch; too thick, curls break.
- 14 Freeze tray 4 to 6 minutes. Finger test: touch lightly, impression stays but no dent. Chocolate should be pliable, not frozen solid.
- 15 Use sharp straight spatula, push up from bottom edge in small sections to release delicate curls. If chocolate cracks, leave out 2 minutes, test again; temperature critical for curls, too cold brittle, too soft no shape.
- 16 Store curls on freezer-safe plate in freezer until garnish time. Place curls gently on pie rim just before serving. They add texture, subtle snap.
- 17 Chilling long and slow makes difference. Kept cheesecake dense enough to slice clean, but light with whipped topping. Sour cream tang cuts richness. Semi-sweet chocolate balances sugar from cherries and crust.
- 18 If no cherry pie filling, use fresh pitted cherries with bit of cornstarch and sugar heated to thick syrup as homemade option—fruit-forward approach.
- 19 Final thoughts: folding whipped topping is delicate; overmix and cake deflates, undermix and layers separate. Practice makes progress. Chocolate curls, worth effort, but broken shards edible fallback with whipped cream dollop.
- 20 If crust soggy, bake crust blind 7 minutes before adding filling next time. For now, no bake important for creamy texture.
Nutritional information
Calories
600
Protein
7g
Carbs
53g
Fat
44g
Frequently Asked Questions About No-Bake Chocolate Cheesecake
Can I make this the night before serving? Yes. Eight hours is better than seven. Overnight is ideal. The flavors actually taste better after sitting. Just add the cherries and curls the day you serve it so the crust doesn’t get soggy.
What if I don’t have the exact type of chocolate? Semi-sweet baking chocolate works. Dark chocolate makes it less sweet. Milk chocolate works too but tastes like candy. Avoid white chocolate—defeats the whole Black Forest thing. The bar form matters more than the exact cocoa percentage.
Why does my whipped topping deflate when I fold it in? Overmixing. Folding means spatula in, scoop from the bottom, fold over the top, rotate. Not stirring. Not beating. You’re trying to keep air pockets alive. Rotate the bowl, don’t rotate your wrist. Big difference.
Can I use fresh whipped cream instead of store-bought topping? Technically yes. Structurally, no. Fresh cream deflates faster and makes the layers wetter. Store-bought holds its shape better when you fold it in. Use what you’ve got, but expect it softer.
How long does this keep in the fridge? Three days. After that the crust starts absorbing moisture and gets mushy. You could freeze it but thaw it in the fridge for 8 hours and it’s slightly different texture—still good, just different.
What if the chocolate curls won’t curl? Temperature. Too cold and it shatters. Too warm and it stays flat. Leave it out 2 minutes, test again. You’re looking for pliable, not frozen. It’s finicky but gets easier.
Can I skip the chocolate curls? Yes. Broken shards, crushed chocolate, cocoa powder on top. They all work. The curls are fancy but not essential. Cherry filling is the actual garnish doing the work.
What if I hate sour cream? Greek yogurt works. Same amount. Texture’s slightly different—denser—but the tang is still there. Don’t use whipped cream instead. Flavor falls flat.
You’ll Love These Too
Explore all →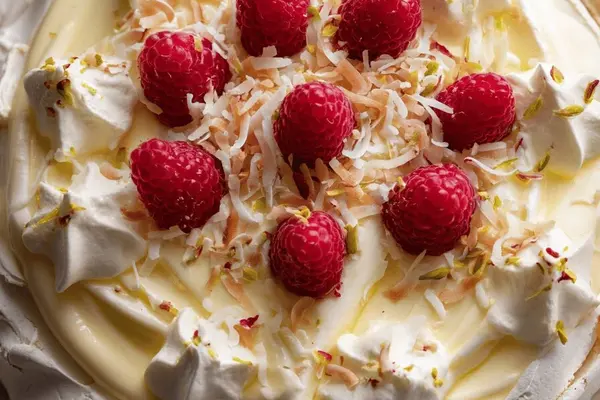
Lemon Pavlova with Yuzu Filling Recipe
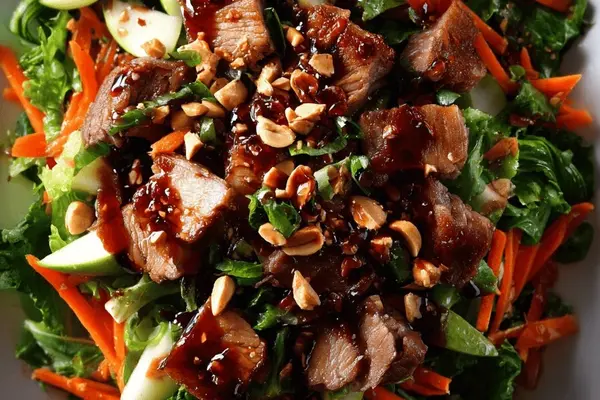
Pork Bok Choy Salad with Teriyaki Dressing

Brown Chicken Gravy with Roasted Wings

Crunchy Sesame Chicken with Honey Sriracha

Hearty Goulash Soup with Ground Beef
Peanut Butter Cookies with Honey
Recipe For Making Salsa With Pineapple
Cold Sesame Noodles with Smoked Tofu
Pork Chop Marinade with Smoked Paprika
Maple Slow Cooker Pudding with Bourbon
Roasted Pumpkin Side Dish with Fennel Seeds
Chocolate Chip Cookie Recipe with 3 Chips

Easy Crock Pot Chili with Ground Beef
Bread Pudding Recipe with Cinnamon & Caramel
Mulling Spices For Cider With Rum

Roasted Bell Pepper Soup Recipe

Oven Roasted Cauliflower Rice with Cheddar
Crispy Potato Lace with Thyme & Rosemary
Baked Beans with Ground Beef and Bacon