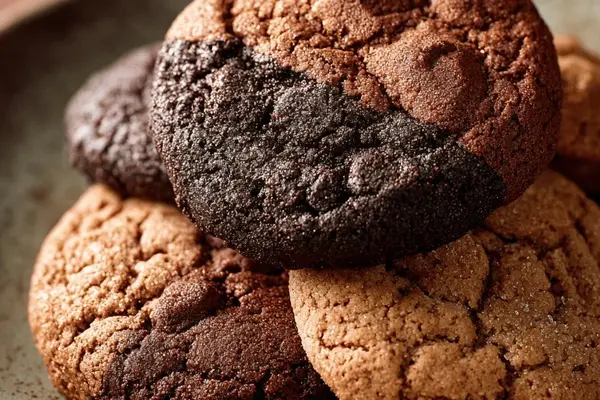
Ginger Cookies Recipe: Layered Butter & Chocolate
By Emma
Certified Culinary Professional
·
Recipe tested & approved
Cut the butter dough thin. Really thin. Stack it with chocolate, then molasses—three layers, spiced edge to edge. Bake until they snap between your teeth. Takes 47 minutes total if you move right, and that includes the chill time that actually matters.
Why You’ll Love These Ginger Cookies
Cookies that taste like three different flavors at once. Butter, chocolate, spice all hitting at the same time. Works cold the next day. Maybe better. No mixer needed. Just dough, a knife, and patience with layers. They’re not soft. They snap. Some people want that in a cookie—a texture that actually holds. Molasses cookies done three ways without making three batches.
What You Need for These Spiced Molasses Cookies
A quarter batch of butter cookie dough. Room temperature is wrong—cold is right. Half a batch of dark chocolate dough. Same firm state. Half a batch of spiced molasses dough. This replaces gingerbread, just deeper and less sweet. Flour. Not much. Just for dusting so nothing sticks to the counter. Water in a shallow bowl. A brush works. Your finger works too. Parchment paper. Silicone mats if you have them. Makes the difference between crispy and slightly soft.
How to Make Ginger Snaps Layered Three Ways
Roll the first dough disk between parchment sheets if the counter’s too warm. About 3 millimeters thick. Maybe less—even thickness matters because edges cook faster. Keep the edges sharp or the rectangles won’t stack clean. Thirty by twenty-three centimeters is the target. Don’t fuss if it’s 29 or 31. Close enough.
Brush water over the whole thing. Barely. Your brush should feel almost dry. Too much and the layers get soggy. Too little and they slide around when you stack.
Butter dough first. Then chocolate. Then molasses. Press down gently. Not hard. You’re sealing, not kneading. Air bubbles ruin the structure.
Cut the stack into thirds. You get three rectangles, roughly twenty-three by ten centimeters each. Brush each one again with that same ghost of water. Restack them. Alternate colors as you go—butter, chocolate, molasses, butter, chocolate, molasses. More layers. More contrast.
Wrap it tight in plastic. Refrigerate. The recipe says 35 minutes minimum. Mine usually takes longer because I forget about it.
How to Get Ginger Snap Cookies Crispy Between the Layers
Preheat to 180 Celsius. That’s 350 Fahrenheit. Mid-oven rack. Heat distribution matters here more than you’d think.
Line the sheets with parchment. Or silicone. Either one stops the bottoms from burning and lets the layers actually crisp instead of going dense.
Slice the chilled stack crosswise or lengthwise. Five to six millimeters thick. Your knife needs to be sharp. Dull knives crush the layers. If the dough starts cracking while you cut, press the edges back together gently. If it’s too soft and keeps falling apart, chill it for five more minutes. It’ll firm up.
Space them on the sheets. Leave room between each one. Crowding means steam. Steam means chewy edges. You don’t want that.
Twelve minutes in the oven. But watch them. The aroma changes first—suddenly you smell molasses and ginger and chocolate all at once. That’s when you look. Edges go from pale to faint golden. Bottoms show light brown spots. Tops feel firm but not dark.
Pull them when the bottoms look right. They firm up as they cool. The snap develops on the rack.
Ginger Molasses Spice Cookies Tips and What Goes Wrong
Store them cold in an airtight container. They keep crisp for a week. Maybe longer if you actually have restraint.
Don’t cut them warm. The layers separate if you do. Wait for the rack cooling. It takes ten minutes. Feels long. Isn’t.
Water matters more than you’d think. Too much makes it muddy. Too little and the dough slides. Brush like you’re barely touching it.
Sharp knives. Blunt ones crush everything. Worth saying twice.
Soft doughs don’t stack clean. That 35-minute chill is minimum. It’s there for a reason. Rushed version comes out grainy and dense.
Rolling even thickness—this one kills people. Thick spots bake too slow. Thin spots burn. Use your eyes more than the recipe. If a spot looks thinner, it probably is.
Ginger Cookies Recipe: Layered Butter & Chocolate
Prep:
35 min
Cook:
12 min
Total:
47 min
Servings:
1 to 2 dozen
Ingredients
- ¼ batch butter cookie dough
- ½ batch dark chocolate dough
- ½ batch spiced molasses dough (replaces gingerbread)
- Flour for dusting
- Water for brushing
Method
- 1 Chill all doughs before starting—firm but pliable is key. Avoid room-temp sogginess.
- 2 On a lightly floured surface or between parchment sheets, roll one dough disk into a 30 by 23 cm rectangle about 3 mm thick. Keep edges even or cookies won’t stack clean.
- 3 Brush a very light layer of water over the whole rectangle—just enough to tack the layers but not soak.
- 4 Layer doughs alternately: start with butter, then chocolate, then molasses for a rich stack. Press gently to seal air bubbles but don’t knead in.
- 5 Cut this stack into thirds to get rectangles roughly 23 by 10 cm. Water each cut piece’s surface lightly again. Restack, alternating colors as before, to build contrast in layers.
- 6 Wrap tightly in plastic. Refrigerate 35 minutes minimum to firm up structure and prevent mushy slicing later.
- 7 Preheat oven to 180 °C (350 °F). Position rack mid-oven for even heat.
- 8 Line baking sheets with parchment or silicone mats. This prevents sticking and promotes even browning under the layered edges.
- 9 Slice the chilled layered dough crosswise or lengthwise into 5-6 mm thick strips. Then cut these into small rectangles.
- 10 If dough starts cracking during cutting, press edges gently to rebind; if too soft, chill briefly again. Sharp knives matter here.
- 11 Arrange spaced on sheets; leave breathing room; edges crisp faster when not crowded.
- 12 Slide into oven, bake about 12 minutes but watch color closely. Edges will shift from pale to faint golden; aroma deepens, with a hint of molasses warmth emerging.
- 13 Pull when bottoms show light browning spots and tops feel firm but not darkened.
- 14 Cool fully on rack. They firm up as they cool and develop a delicate snap between layers.
- 15 Store in airtight containers once cold; keeps crisp up to a week.
Nutritional information
Calories
110
Protein
1g
Carbs
13g
Fat
6g
Frequently Asked Questions About Ginger Bread Recipe Cookies
Can I make this ahead? Make the doughs days before. Store them in the fridge wrapped tight. The baked cookies keep crisp for a week in a sealed container.
What if my dough cracks when I cut it? Too warm. Chill it again for five minutes. Cracking means the layers aren’t bonded yet.
Do I have to alternate the colors when I restack? No. But it looks better. Contrast makes the layers visible when you bite. If you don’t care about that, stack however you want.
Can I use salted butter instead of unsalted? Probably fine. Just taste the dough first. Reduce the salt slightly if you do.
Why does the water layer matter? It bonds the doughs so they don’t separate when you cut and bake. Without it, the layers fall apart.
How thick should the strips be? Five to six millimeters. Thicker and they stay gummy inside. Thinner and they burn before the center bakes.
You’ll Love These Too
Explore all →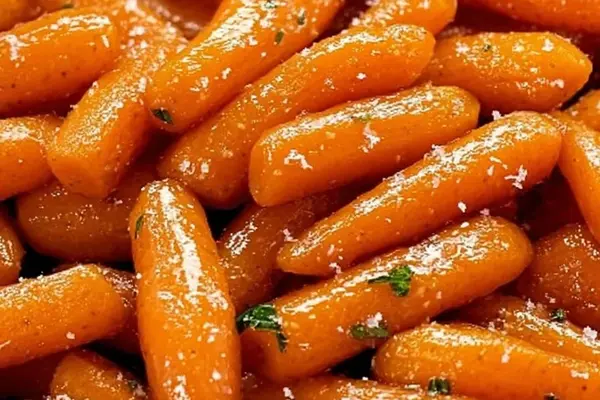
Glazed Carrots with Maple Syrup & Brown Sugar

Chicken Stir Fry Rice Noodles with Sesame
Rustic Berry Cobbler with Buttermilk Biscuits
Strawberry Short Cake with Pretzel Crust
Creamy Asparagus Mussel Soup Recipe

Smorrebrod with Prosciutto and Strawberries

Glutinous Rice Mochi Ice Cream Recipe
Lemon Arugula Tortellini Skewers with Mozzarella
Marshmallow Pecan Brownies Recipe
Ricotta Cream Heart with Lemon & Maple
Spicy Seafood Pasta with Crushed Tomatoes
Carrot Cake Muffins with Cream Cheese

Fluffy Pancakes Recipe with Buttermilk
Key Lime Pie with White Chocolate Fudge
Caesar Drink Clamato with Cilantro
Glazed Pork Filets with Apricot Jam
Apple Blueberry Almond Muffins Recipe
Marinated Chicken With Yogurt & Chickpeas
Homemade Reese's Peanut Butter Cups Recipe