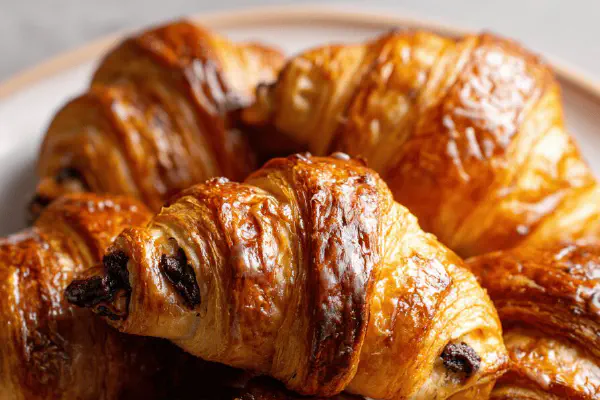
Twisted Chocolate Croissants
By Emma
Certified Culinary Professional
Before You Start
Ingredients
- 1 simplified viennoiserie dough
- 60 g dark chocolate batons
- 25 g dark chocolate flakes
Glaze
- 1 egg yolk
- 20 ml whole milk
- 5 ml honey
- 1 tsp finely grated orange zest
In The Same Category · Breakfast
Explore all →About the ingredients
Method
Chocolate Pieces
- 1. Line baking sheet with silicone mat or parchment. Keep it flat, no wrinkles, they trap steam and wreck crisp edges.
- 2. Lightly dust work surface with flour — not too much or dough stiffens — roll dough into rectangle about 50 x 24 cm (20 x 9.5 inches), ~6 mm thick. Trim edges roughly but don’t obsess, slight unevenness won’t ruin croissants.
- 3. Cut dough horizontally into 8 equal rectangles approximately 25 x 6 cm (10 x 2.5 inches) each. Don’t press too hard with knife; clean cuts keep shapes tight.
- 4. On each piece, lay two lines of dark chocolate batons spaced 2 cm and 4.5 cm apart from one short edge. On half the rectangles, sprinkle dark chocolate flakes atop batons for a textural surprise.
- 5. Fold the closest short edge over the first chocolate baton, enveloping it snugly. Then fold dough over itself three more times, total of four folds, sealing chocolate inside. This creates compact rolls to trap molten chocolate pools later.
- 6. Place rolled pastries seam side down on the baking sheet, spaced at least 3 cm apart — they'll puff up.
- 7. Cover loosely with plastic wrap. Let rise in warm spot 50 – 60 minutes or until doubled. Dough should feel airy, soft to touch, not sticky or overly wet. If under-risen, pastries stay dense; over-risen means collapse during baking.
Glaze Preparation
- 8. Whisk egg yolk with milk, honey, and grated orange zest. Honey adds caramel notes and hue; orange zest lifts aroma cutting chocolate richness.
- 9. Before baking, brush glaze evenly over all rolls. Avoid pooling of glaze, which can burn and create bitter spots.
Baking
- 10. Preheat oven to 175 °C (350 °F), rack in middle.
- 11. Bake pastries 18 – 22 minutes until golden bronze with darker caramel tones on edges. Surface should be firm yet slightly springy when pressed gently. If shiny or pale, bake longer; dull dark color but not burnt is best.
- 12. Remove from oven; cool on wire rack 30 minutes minimum before biting in. Inside should be flaky but moist; chocolate molten but not oozing dangerously.
- 13. Serve warm or room temp. For crunchier crust, reheat briefly before eating.
Troubleshooting
- 14. Dough too sticky? Chill 15 min before cutting. Chocolate melting too fast? Use semi-hard batons or chill rolled croissants prior to baking 10 min.
- 15. No glaze? Brush milk alone or egg white with pinch of sugar instead.
- 16. Out of chocolate? Use hazelnut spread piped in lines — flavor changes but texture remains luscious.
- 17. Overbaked? Crust will crack and bitter; underbaked remain dense. Use sight, touch, and aroma cues more than rigid times.
Cooking tips
Chef's notes
- 💡 Dust work surface lightly, avoid excess flour or dough stiffens fast; not enough flour? Sticky mess, hard folds. Trim edges rough but don’t obsess; unevenness won’t ruin final shape or crumb. Dough elasticity key; folds trap air layers—four folds precisely, no less or roll collapses.
- 💡 Chocolate placement near edge gives molten pools when baking; batons melt slower than flakes - flakes add crisp contrast but can burn faster. Use semi-hard if melting too quick. Folding tight seals chocolate inside; too loose leads to leakage, slick mess baking sheet.
- 💡 Glaze mix not just shine but controls caramelization; honey brings amber glow and caramel snap, orange zest lifts bitterness, cuts deep chocolate notes. Brush thinly to avoid pools; pooling burns fast spots. If no honey, swap maple or agave but flavors shift noticeably.
- 💡 Proofing critical: dough doubled means airy but not soggy; finger dent bounces back slow? Proof more but careful - overproof collapses structure. Temperature 50-60 mins warm spot ideal. Underproof means dense, heavy bites—know dough feel, watch rise quietly.
- 💡 Bake on middle rack at 175°C; check crust color after 15 minutes - golden bronze with darker edges signals readiness. Shiny or pale means underbake, dull too dark means close to burnt. Cool 30 mins on wire rack; hot chocolate can burn tongue, crumb firms for slicing.
Common questions
How to prevent croissants from getting soggy?
Proof properly — no over or under. Dough tight, folds sealed. Baking tray dry, no steam traps. Use parchment or silicone - no wrinkles. Cool fully before storing. Warm reheating crisp edges back.
What if I run out of dark chocolate?
Use hazelnut spread piped in lines for molten pockets. Different texture but still rich. Or semi-sweet chips; melt faster though. Flakes add crunch but burn quick; adjust bake time.
Dough too sticky, how to handle?
Chill 15 minutes. Flour work surface sparingly; excess dries crumb. Keep hands cool, fold gently. Sticky means gluten too active or humidity high. If sticky still, rest longer or add tiny flour bits flour can betray texture.
Best way to store leftovers?
Airtight container room temp for day of baking. Refrigerate makes crumb dry fast. Freeze wrapped well to keep moisture. Reheat brief in oven restores crisp crust; microwave ruins layers and texture.
