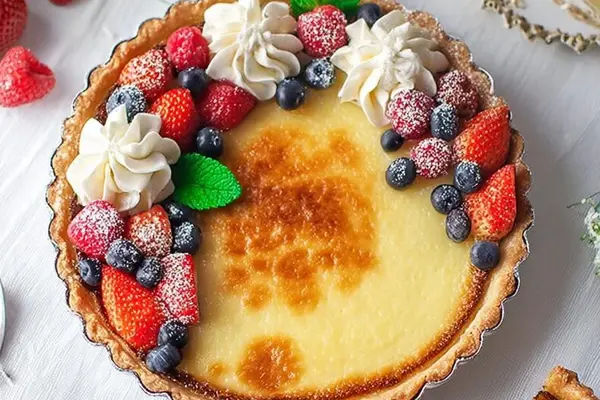
Vanilla Custard Pie
E
By Emma
Certified Culinary Professional
•
Recipe tested & approved
Classic custard pie with homemade pie crust. Uses vanilla bean for depth, lemon zest for brightness. Custard poured in two batches for creamy texture. Baked until just set, edges crimped then shielded to avoid burning. Chilling dough prevents shrinkage. Milk scalded with vanilla to coax aroma. Egg-sugar mix beaten frothy before slow wet whisk. Careful watch on pie’s jiggle signals doneness. Substitute vanilla bean with high-quality extract. Use light cream for creamier custard. Perfect for breaks in routine baking, old-school flavor with gentle update. Twelve servings, classic American dessert. Cook smart, trust feel, listen for gentle oven hum.
Prep:
25 min
Cook:
50 min
Total:
1h 15min
Servings:
12 servings
#American dessert
#baking
#custard
#homemade pie crust
#vanilla
Before You Start
Diving right in—custard pie is a deceptively simple classic. You think just eggs, milk, sugar? Nope. Custard is all about gentle coaxing. You gotta coax flavor out of vanilla bean, coax the dough not to shrink, coax custard to set without cracking or curdling. Past trials taught me that ignoring chilling is disaster; hot pie crust is trouble. The aroma when milk hits vanilla bean? Subtle but hypnotic—makes the kitchen feel warm and inviting. Lemon zest cuts sweetness, gives brightness. Baking in two stages keeps custard creamy, doesn’t let it cook too fast at bottom. Watch for the jiggle, not the clock. Those tiny cues turn guesswork into art. I’ve learned to trust stove noises and oven hum, not blindly watch timer. Use this knowledge against mishaps—substitutions for bean and cream so nothing’s lost if pantry gets bare. Schooling in old school dessert, with my modern tweaks.
Ingredients
- 1 batch homemade pie crust dough chilled at least 1 hour
- 4 cups whole milk or half-and-half for richer custard
- 1 whole vanilla bean pod or 1½ tablespoons vanilla extract if skipped bean
- 6 large eggs
- ¾ cup granulated sugar
- 1 tablespoon finely grated lemon zest
In The Same Category · Desserts
Explore all →
Gluten-Free Strawberry Rhubarb Crisp
Raspberry Whoopie Pies
Twisted Tiramisu Revival
Cinna-Sugar Cupcakes
Apricot Coconut Bars
Peanut Butter Crinkle Cookies
Billets with Haskap and Coconut
Lemon Raspberry Tart
Maple Stuffed Apple Dumplings
Eggnog White Chocolate Fudge
Zesty Shortbread Bars
Spiced Pumpkin Mousse

Salted Caramel Choc Chip Cookies
Spiced Applesauce Cookies
Butterscotch Snow Taffy Remix
Eggnog Cheesecake Twist

Raspberry Cheesecake Cookies Twist
Soft Peanut Butter Cookies
Creamy Chocolate Poke Cake
Sheet Pan Choco Cake
About the ingredients
Homemade pie crust is key. Keep dough cold throughout or you’ll end up with puckered edges and tough crust. Butter or shortening can both work; butter gives flavor but short gives flakiness. For milk, whole or half-and-half both viable; half-and-half fattier and richer but scald slower to avoid scorching. Vanilla bean unavailable? Vanilla extract is fine—add it at egg stage to prevent aroma loss in heat. Lemon zest adds essential brightness to the custard, balances creamy sweetness. Overdoing citrus can turn bitter, so keep it measured. If you want to add a twist, grated nutmeg or cardamom stirred into eggs before milk adds an exotic note, but starts with basics first. The choice of sugar—granulated works well, but superfine can dissolve quicker for silkier custard. Keep eggs at room temp for better emulsions. Fresh eggs have better bubbles, more lift.
Method
- Roll chilled dough to about ½ inch thickness. Press firmly but gently into pie dish, crimp edges for grip and look. Pop in fridge while prepping custard. Keeps dough cold, avoids shrinking during baking.
- Slice vanilla bean lengthwise, scrape all sticky seeds out. Toss seeds and pod into heavy saucepot with milk or cream. Slowly warm over medium heat, aiming for just under simmer at 180°F — small bubbles form, skin starts rising. No boiling or scorching.
- Remove vanilla pod immediately once milk scalded. Discard pod; seeds stay in milk. The aroma should be warm, floral, slightly sweet but restrained.
- Meanwhile, whisk eggs briskly with sugar and lemon zest until pale and frothy. This air lifts custard base—don’t skip. Pour slow stream of hot milk into egg mix while whisking nonstop to avoid scrambled lumps.
- Preheat oven to 395°F — a notch below usual 400 to allow room for residual heat and slight oven quirks. Pour about two thirds of custard into pie crust. Bake uncovered for 20 minutes, then carefully pour remaining custard to almost fill dish; return immediately.
- Bake 40-45 minutes more—until surface is set but still jiggles gently in center when nudged. Edges golden but not burnt; aluminum foil strips shield crust edges if they brown too fast.
- Cool pie at room temperature till slightly warm then refrigerate a few hours for custard to firm up. Slicing straight from hot oven ruins texture; patience worthwhile.
- If vanilla bean not available use double-strength vanilla extract but add with wet ingredients to avoid losing aroma in mic with heat. Lemon zest can swap with orange for different citrus twist.
- Don’t forget chilling dough stage or risk shrinking crust. Hot custard poured in layers keeps filling balanced and texture consistent.
- Custard done if edges firm, center has slight wobble but no liquid sloshing. Pie surface should pop with gentle tap, no cracks or dryness.
Cooking tips
Cold dough pressed firmly prevents bounce-back in oven. Chilled crust reduces shrinkage and soggy bottoms. Scalding milk brings flavor out of vanilla, kills raw taste but avoid boiling to prevent skin or burnt smell. Scraping vanilla seeds by hand gives deeper aroma—not some powder substitute. Whisk eggs vigorously with sugar until light—air bubbles build patience into custard. Slowly temper hot milk into eggs, or you’ll scramble. Pour custard in two phases—helps control fill level and texture gradients. Oven heat steady but a little lower than full 400°F avoids cracking. Once near done, test pie by gently shaking. Should jiggle lightly but hold shape. Cover edges with foil to protect crust. Cool slowly for custard to set fully; rushing ruins creamy interior. Freeze leftovers wrapped tight, reheated gently or eaten cold. Remember these cues not clocks. The sound of oven fan changing tone, faint kitchen smells, even crust edge color all tell stories if you pay attention.
Chef's notes
- 💡 Chill pie dough well, firm press into dish. Cold dough means less edge shrinkage and flakier crust. Warm dough bounces back in oven, puckers edges. Always rest dough minimum 1 hour. Butter or shortening? Butter gives richer aroma. Shortening for flakiness but less flavor. Balance your choice depending on taste priority.
- 💡 Scald milk slowly. Use medium heat. Just before tiny bubbles form and skin lifts. No boiling or scorching. Remove vanilla pod promptly to avoid bitter taste. Seeds stay in milk to steep aroma. If no bean, use double-strength vanilla extract. Add extract at egg stage or aroma fades with heat. Remember: heat kills scent fast.
- 💡 Pour custard in two batches. First about two-thirds baked uncovered for 20 minutes. Then add second pour to nearly fill. Controls texture gradient—creamier top, set bottom. Prevents overbaking and cracking. Oven temp slightly below 400°F is intentional: residual heat finishes custard gently, avoids dry edges or fissures.
- 💡 Watch for jiggle. Not firm like cake but move gently in center. Edges set, golden but no burnt spots. Use foil strips if crust edges brown too quickly. Don’t rush cooling. Let custard firm at room temp before refrigeration. Cutting hot pie breaks texture, makes custard watery. Patience here pays off.
- 💡 If swapping lemon zest, orange zest works different citrus hit. But too much zest? Bitterness creeps in fast. Keep measurements tight. Superfine sugar dissolves smoother in eggs but granulated works too. Room-temp eggs give better froth and emulsification. Fresh eggs — bubbles hold longer. Air in eggs lifts custard texture subtly.
Common questions
How to avoid pie crust shrinking?
Chill dough minimum 1 hour. Press firmly but gently in dish. Keep cold while prepping custard. Warm dough stretches and pulls back during bake. Resting dough relaxes gluten. Crust with butter tightens less than shortening but both need cold handling.
Can I skip vanilla bean?
Yes. Substitute with double-strength vanilla extract. Add with eggs to keep aroma. Adding to milk scald loses scent from heat. Bean seeds add depth no extract fully matches but extract good backup. Cocoa or almond extract possible alternative flavors if adventurous.
Custard cracks, what happened?
Oven too hot or baking straight through. Pour custard in batches to control heat exposure. Bake at slightly less than 400°F. Watch jiggle not time. Overbake dries custard surface, cracks form. Cover crust edges with foil to prevent burning or dry spots that worsen cracks.
Pie storage options?
Cool completely before fridge. Refrigerate loosely covered or tightly wrapped to avoid absorbing odors. Keeps 3-4 days. Freeze portions tightly wrapped; texture may change but reheats well in low oven or eaten cold. Avoid room temp storage over 2 hours due to dairy and egg risk.
You’ll Love These Too
Explore all →
Beer Battered Fish Fry
Brown Sugar Pecan Cake

Sweet Potato Snaps
Blueberry Pancake Mix
Beef Ragu Recipe

No Bake Horse Cookies
Fresh Raisins in Syrup

Snickers Apple Salad
Red Cabbage Apple Salad
Strawberry Cinnamon Rolls Remix
Salted Caramel Shortbread Bars
Coffee Cake with Chocolate Meringue
Salsa Chicken Bake

Pulled Pork Smoked Gouda Egg Rolls
Raspberry Cupcakes Twist

Lentil Wonton Tacos Remix

Slow-Baked White Beans with Soft-Boiled Eggs
Rabbit with Pancetta and Mushrooms
Spicy Crispy Deviled Eggs
Berry Quinoa Bowl