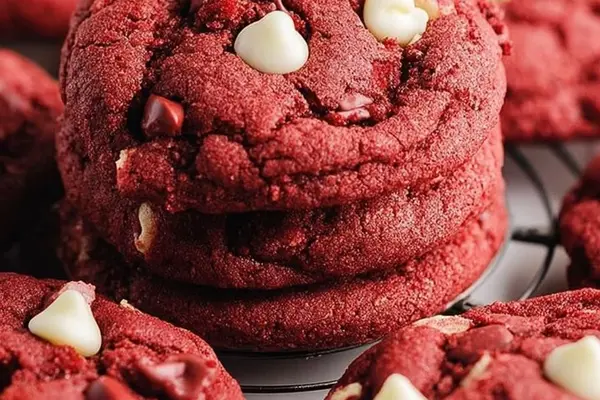
Red Velvet Chocolate Chip Cookies
By Emma
Certified Culinary Professional
·
Recipe tested & approved
Butter and sugar go in first. Cream them until they’re light and fluffy — the whole base of the cookie depends on it. Then eggs, vanilla, the red coloring that goes deep, not pale. White chocolate chips folded in gently. Ten minutes in a 350-degree oven and you’ve got cookies that taste like chocolate chip but look like they walked out of a bakery window.
Why You’ll Love These Chocolate Chip Cookies
Takes 16 minutes to prep, 10 in the oven. Twenty-six minutes total from counter to cooling rack. Chocolate and white chocolate together — the cocoa powder keeps them from being too sweet, the chips add pockets of cream. The red color stays bright the whole time. Not faded. Not pale pink. Edges crisp, centers soft. That’s the cream of tartar doing its thing. Makes enough to eat three and have leftovers that taste better the next day, which is weird but true.
What You Need for Making Chocolate Chip Cookies
All-purpose flour. Two cups. Nothing fancy. Unsweetened cocoa powder — a tablespoon and a half. Cuts the sweetness. Skip it and these are too much. Salt and baking soda together. Half a teaspoon salt, a quarter teaspoon baking soda. Different things, both matter. Baking powder. Another quarter teaspoon. The two leavening agents work together — don’t ask me why exactly, it just works. Cream of tartar. A quarter teaspoon. This is what keeps the edges crispy while the middle stays tender. Butter. Three quarters of a cup, softened. Not melted. Not cold. Room temperature. Sugar. One cup granulated. Two eggs. Large ones. Vanilla. One and a half teaspoons. Red gel food coloring. Three to four teaspoons depending on how deep you want it. Regular liquid coloring won’t give you the same intensity. White chocolate chips. One cup, plus extra for pressing on top while they’re still warm.
How to Make Chocolate Chip Cookies
Set the oven to 350. Line your pans with parchment or grease them lightly — too much oil and the edges won’t get crispy the way you want them to.
Whisk together the flour, cocoa powder, salt, baking soda, baking powder, and cream of tartar in a small bowl. Everything mixed dry before it hits the wet stuff means you won’t get streaks of flour in your dough.
Beat the butter and sugar in a large bowl until it’s light and fluffy. This takes longer than you think. Two, three minutes easy. The fluffiness traps air — that’s what gives the cookie its structure. Skip this step and they’ll be dense. Flat.
Add the eggs one at a time. Mix well after each one. Then the vanilla. The batter should look thicker now, paler. More like actual cookie dough.
Gradually mix in the red food coloring. Scrape the sides of the bowl as you go so the color stays even throughout. You want deep red — pastel looks wrong. Gel coloring is stronger than liquid, so use it.
Pour the dry ingredients into the wet stuff slowly. Stir until everything’s just combined. Don’t overdo it. Too much mixing builds up gluten and that makes the cookies tough.
Fold in the white chocolate chips gently. They should be distributed evenly through the dough but you don’t want to beat them to death.
How to Get Chocolate Chip Cookies Crispy at the Edges
Use a cookie scoop or a spoon to portion out the dough. Make them the same size so they bake evenly. Space them two inches apart on the pan.
Bake for 8 to 10 minutes. The edges should look set. The centers should look slightly underdone — not wet, just not fully firm. The surface might crack a little. That’s right.
While they’re still hot, press a few extra white chocolate chips on top of each cookie. The heat will soften them into a gloss. They’ll look intentional. Finished.
Let them sit on the pan for 2 to 3 minutes. They’re still warm but firm enough now that you can move them without them falling apart. Transfer them to a wire rack. They’ll keep setting as they cool — the insides firm up a bit but stay soft. That’s the point.
Wait until they’re completely cool before eating or storing. The chocolate tastes different when they’re room temperature. Better.
Chocolate Chip Cookie Tips and Common Mistakes
Don’t rush the butter and sugar. It needs to be fluffy. Grainy butter means grainy cookies.
The cream of tartar is the secret to crispy edges and a tender middle. Don’t skip it. Nothing else does exactly what it does.
Coloring matters. Liquid food coloring will water down your dough slightly. Gel won’t. The cookies bake differently with liquid. Use gel.
Underbake them. I know it looks wrong. It’s not. They finish setting as they cool and that’s when they’re best.
White chocolate melts fast. Put the chips on while they’re hot but don’t bake them any longer or the chips will brown too much.
Leftover dough keeps in the fridge for a few days. You can bake a few at a time instead of all at once.
Red Velvet Chocolate Chip Cookies
Prep:
16 min
Cook:
10 min
Total:
26 min
Servings:
18 servings
Ingredients
- 2 cups all-purpose flour
- 2 tablespoons unsweetened cocoa powder
- ½ teaspoon salt
- ¼ teaspoon baking soda
- ½ teaspoon baking powder
- ¼ teaspoon cream of tartar
- ¾ cup unsalted butter softened
- 1 cup granulated sugar
- 2 large eggs
- 1½ teaspoons vanilla extract
- 3 to 4 teaspoons red gel food coloring
- 1 cup white chocolate chips plus extra for topping
Method
- 1 Preheat oven to 350F. Line two baking sheets with parchment or lightly grease; avoid too much oil to preserve crisp edges.
- 2 Whisk together flour, cocoa, salt, baking soda, baking powder, cream of tartar in small bowl. This combo ensures a tender crumb with slight bite from tartar.
- 3 Beat butter and sugar in a large bowl until light and fluffy; don’t rush or you’ll lose that airy base. Fluffy means volume, texture.
- 4 Add eggs one at a time with vanilla; batter will thicken and lighten, this step crucial for smooth incorporation.
- 5 Mix in red food coloring gradually, scraping sides to keep color uniform; you want a deep red—pastel won’t cut it here. Gel coloring works best for intense hues.
- 6 Slowly blend dry ingredients into wet batter; don’t over mix or gluten will toughen cookies.
- 7 Fold in 1 cup white chocolate chips gently but evenly. Chips distribute creaminess inside dough pockets.
- 8 Use a cookie scoop or spoon for even dough balls; space 2 inches apart so edges crisp but centers remain tender.
- 9 Bake 8 to 10 minutes until edges set and centers look slightly underdone but not wet; cookie surface should appear cracked slightly.
- 10 Right out of the oven, press a few white chocolate chips on top; warm cookies will soften these for glossy finish. You’ll have leftovers, stash ‘em.
- 11 Cool on pans 2-3 minutes — still warm but firm enough to move without breaking. Transfer to wire rack to cool completely. Cookies finish setting while cooling.
- 12 Serve once fully cooled; flavors mature and texture firms but stay soft in the middle.
Nutritional information
Calories
247
Protein
3g
Carbs
33g
Fat
12g
Frequently Asked Questions About Making Chocolate Chip Cookies
Can I use regular food coloring instead of gel? Not really. Liquid coloring dilutes the dough slightly and the cookies spread more. They won’t be as thick. Gel is worth buying.
How do I know when they’re done? Look at the edges, not the centers. Edges should look set and slightly darker. Centers look barely underdone. They keep cooking on the pan after you pull them out.
Can I substitute milk chocolate chips for white chocolate? Milk chocolate would work. You’d lose the creamy contrast. Brown butter chocolate chip cookies are good too but that’s a different flavor profile.
Why does my dough look grainy? Butter wasn’t soft enough or you didn’t cream it long enough. Both create a grainy texture that bakes into grainy cookies. Start again or chill and rebake — sometimes it firms up and helps.
Do these cookies stay soft or get hard? They stay soft in the middle for a few days if you store them in an airtight container. The edges stay crispy. After that they get harder but still taste fine.
Can I make the dough ahead? Few hours in the fridge is fine. Overnight gets them too firm to scoop easily — you’d have to let them sit out first. Not worth the hassle.
Why are my oatmeal chocolate chip cookies different from these? Different structure. Oats absorb moisture differently. Oatmeal chocolate chip cookies tend to stay chewy. These are crispy-tender because of the cocoa and the cream of tartar working together. Not the same formula.
You’ll Love These Too
Explore all →
Buttermilk Rye Crumpets Recipe

Roasted Spaghetti Squash with Tomato Sauce
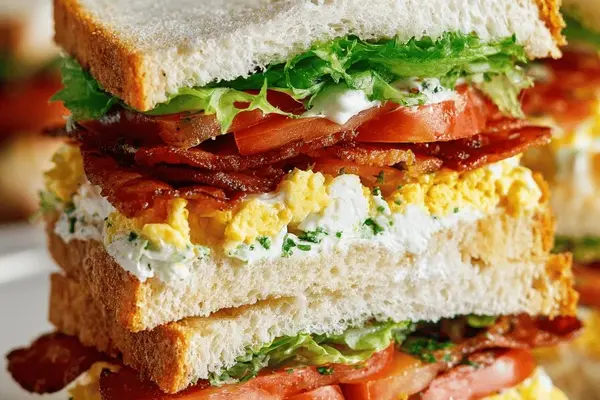
Club Sandwich with Bacon, Eggs & Tomato

Baked Tuna Pasta with Spinach & Artichokes
Auntie Anne's Cinnamon Pretzel Recipe
Pumpkin Cookies with Cream Cheese Frosting
Slow Cooker Chicken Thighs with Potatoes
Cranberry Meringue Wreath with Orange Spice

Salmon Terrine with Cod, Asparagus & Dill

Mexican Soufflé Omelette with Avocado Salsa

Cheeseburger Pie with Bisquick Topping

Vegetarian Soup with Quinoa and Zucchini
Pumpkin Cheesecake with Gingersnap Crust
Recipes With Mince Lamb: South African Bake

Creamy Garlic Mashed Potatoes Recipe
Herb Hummus with Sunflower Seed Butter

Neapolitan Pine Nut Pizzas with Ricotta
Lemon Popcorn With Marshmallow
Lemon Dessert Bars with Ricotta Filling